While ROG Ally is a solid handheld gaming PC, it’s not completely void of issues. You can reboot the device or run one of the Windows troubleshooters to get rid of issue. However, if the problem persists, factory reset the Asus ROG Ally and start everything from scratch. Here are a couple of ways to factory reset ROG Ally.
Apart from fixing stubborn errors and device misbehaves, you can also factory reset ROG Ally when you plan to sell it to someone. You can either use the BIOS or Windows Settings menu to get the job done.
8 things I want to see from the Asus ROG Ally 2
The Asus ROG Ally is already a solid PC gaming handheld, but it could be made even better with these eight upgrades.
Factory reset ROG Ally using BIOS
You can easily factory reset ROG Ally using BIOS. Before you start, make sure to follow the prerequisites below.
- Connect your Asus ROG Ally to a 65W charger so that it doesn’t turn off during the reset process.
- Use the MyAsus app to update the BIOS.
- Connect ROG Ally to a high-speed Wi-Fi network to download a fresh copy of Windows 11.
There are a couple of ways to access BIOS configuration. You can turn off ROG Ally and press the power button. Then, keep pressing the volume-down button until you see the BIOS configuration menu. You can access the same from Windows Settings, too.
- Open Windows Settings and select System.
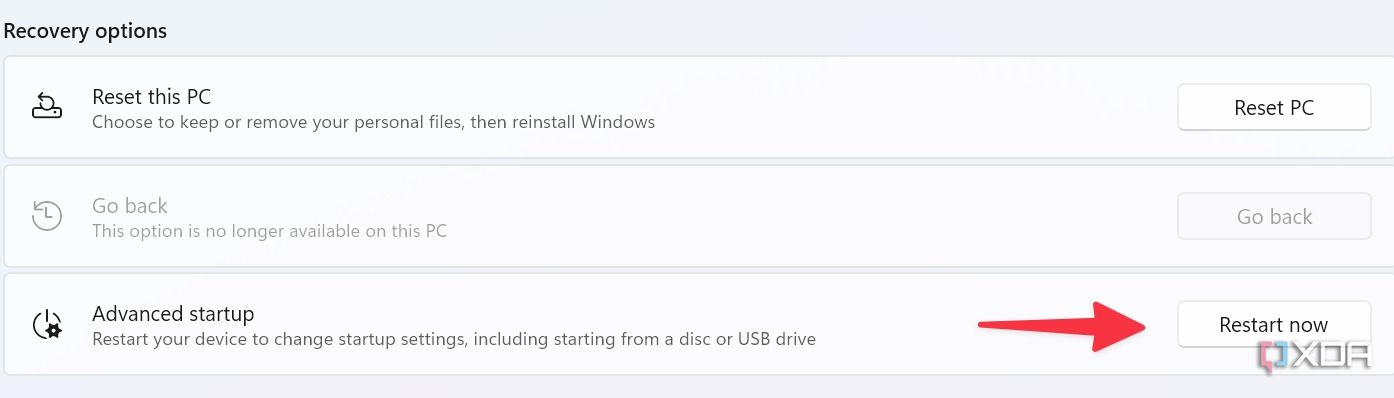
- Select Recovery and find Advanced startup under Recovery options.
- Select Restart now.
- Head to the Troubleshoot > Advanced options > UEFI Firmware Settings.
- It opens the BIOS Utility menu. Enter the advanced menu by pressing Y.

- Slide to the Advanced tab. Select Asus Cloud Recovery and press A.

- It asks to connect to a Wi-Fi network. After that, your ROG Ally downloads a fresh copy of Windows 11.


Windows 11 setup screen should appear once the download process is complete. Sign in with your Microsoft account and follow the on-screen instructions. You can now tweak your ROG Ally and start downloading games from your favorite launcher.
Hard reset ROG Ally from Windows Settings
If the trick above doesn’t work for you, use the Reset menu in Windows Settings to factory reset ROG Ally. Go through the steps below.
- Launch Windows Settings and go to System > Recovery menu.

- Select Reset PC.

- You can either choose to keep all files or remove everything. Select Remove everything. Confirm your decision to start the reset process.

- Your ROG Ally should reboot a couple of times to complete the reset process.


It may take around 30 minutes to an hour to factory reset ROG Ally. So, have some patience and keep your gaming PC connected to a power source.
Set up your ROG Ally from scratch
When you can’t troubleshoot a specific problem on ROG Ally, factory reset it as a last resort. Many ROG Ally users have also raised concerns about shorter-than-expected battery life on their devices. If you have faced the same, check our dedicated guide to increase battery life on the Asus ROG Ally.
You may also run into performance issues when the built-in SSD is full due to a vast game collection. You should pick a high-capacity SSD for your ROG Ally and swap the current SSD with a new one.