Good browser hygiene, believe it or not, is crucial for online safety. I say that because things like your browsing history — which is essentially a window into who you are — can cause a lot of problems for you when it gets in the wrong hands. That’s why clearing your browser history frequently is just as important as, say, using a password manager. Consider this as a reminder to clear your browser history if you haven’t done it in a while.
Best web browsers for Windows in 2023
There are plenty of options when it comes to web browsers for Windows, but if you’re trying to choose one, here are our top recommendations.
How to delete browser history in Chrome
You clear your entire history or select a date range
Deleting the browser history is fairly simple, and it only takes a few steps, regardless of the web browser you’re using on your laptop or smartphone. If you are a Google Chrome user and are wondering how to do it, then here’s a step-by-step guide that you can follow along to clear history.
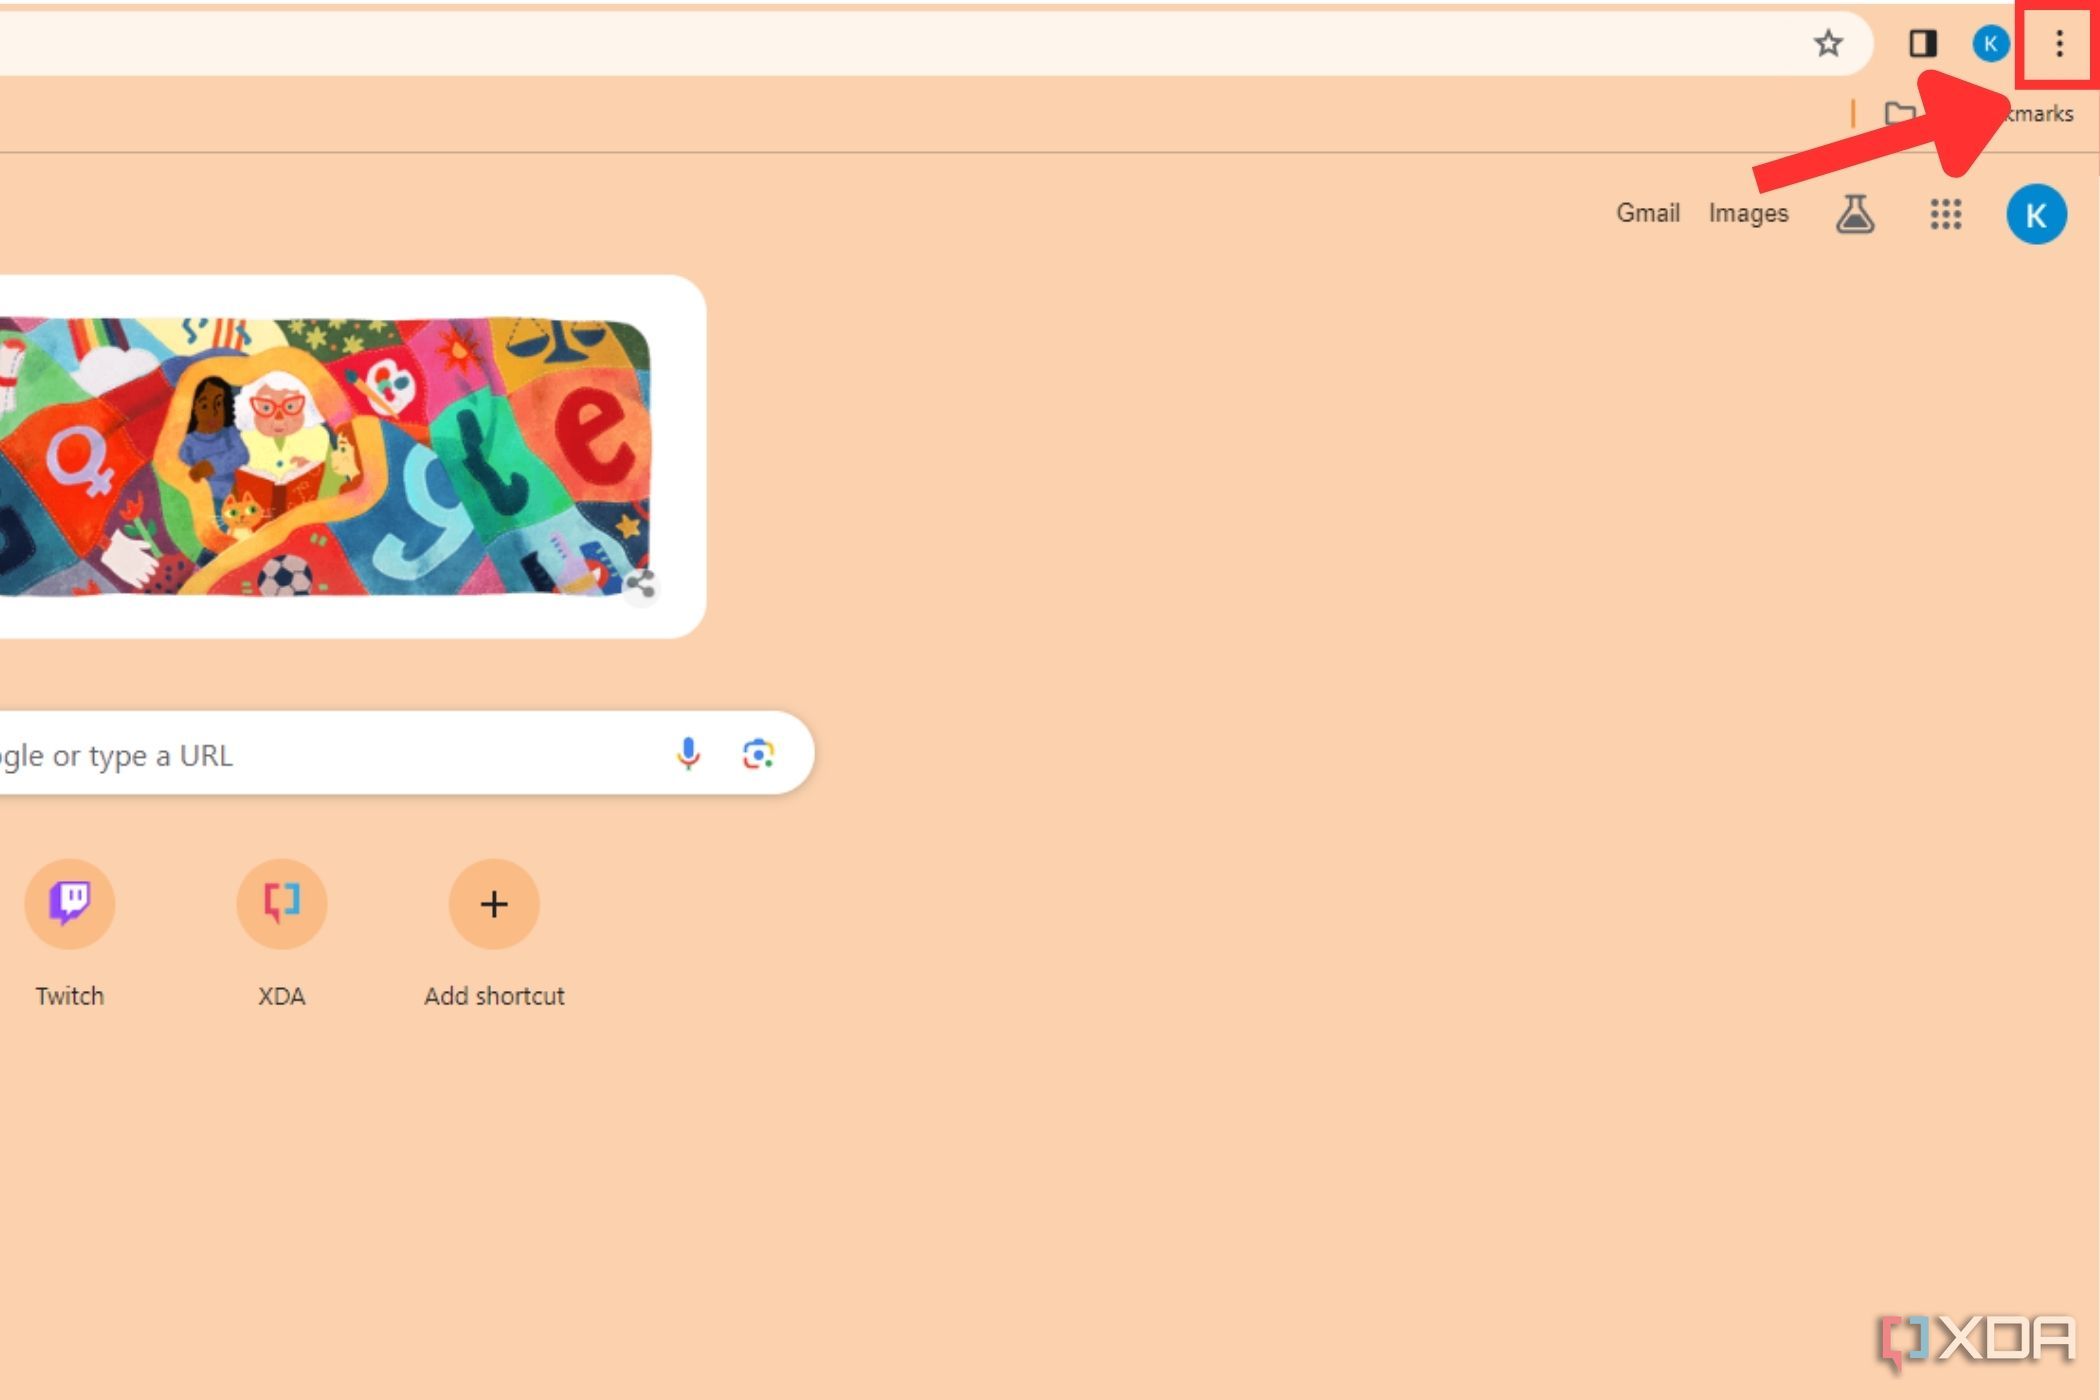
- Open Google Chrome, and click the three-dot icon in the top-right corner of the screen.
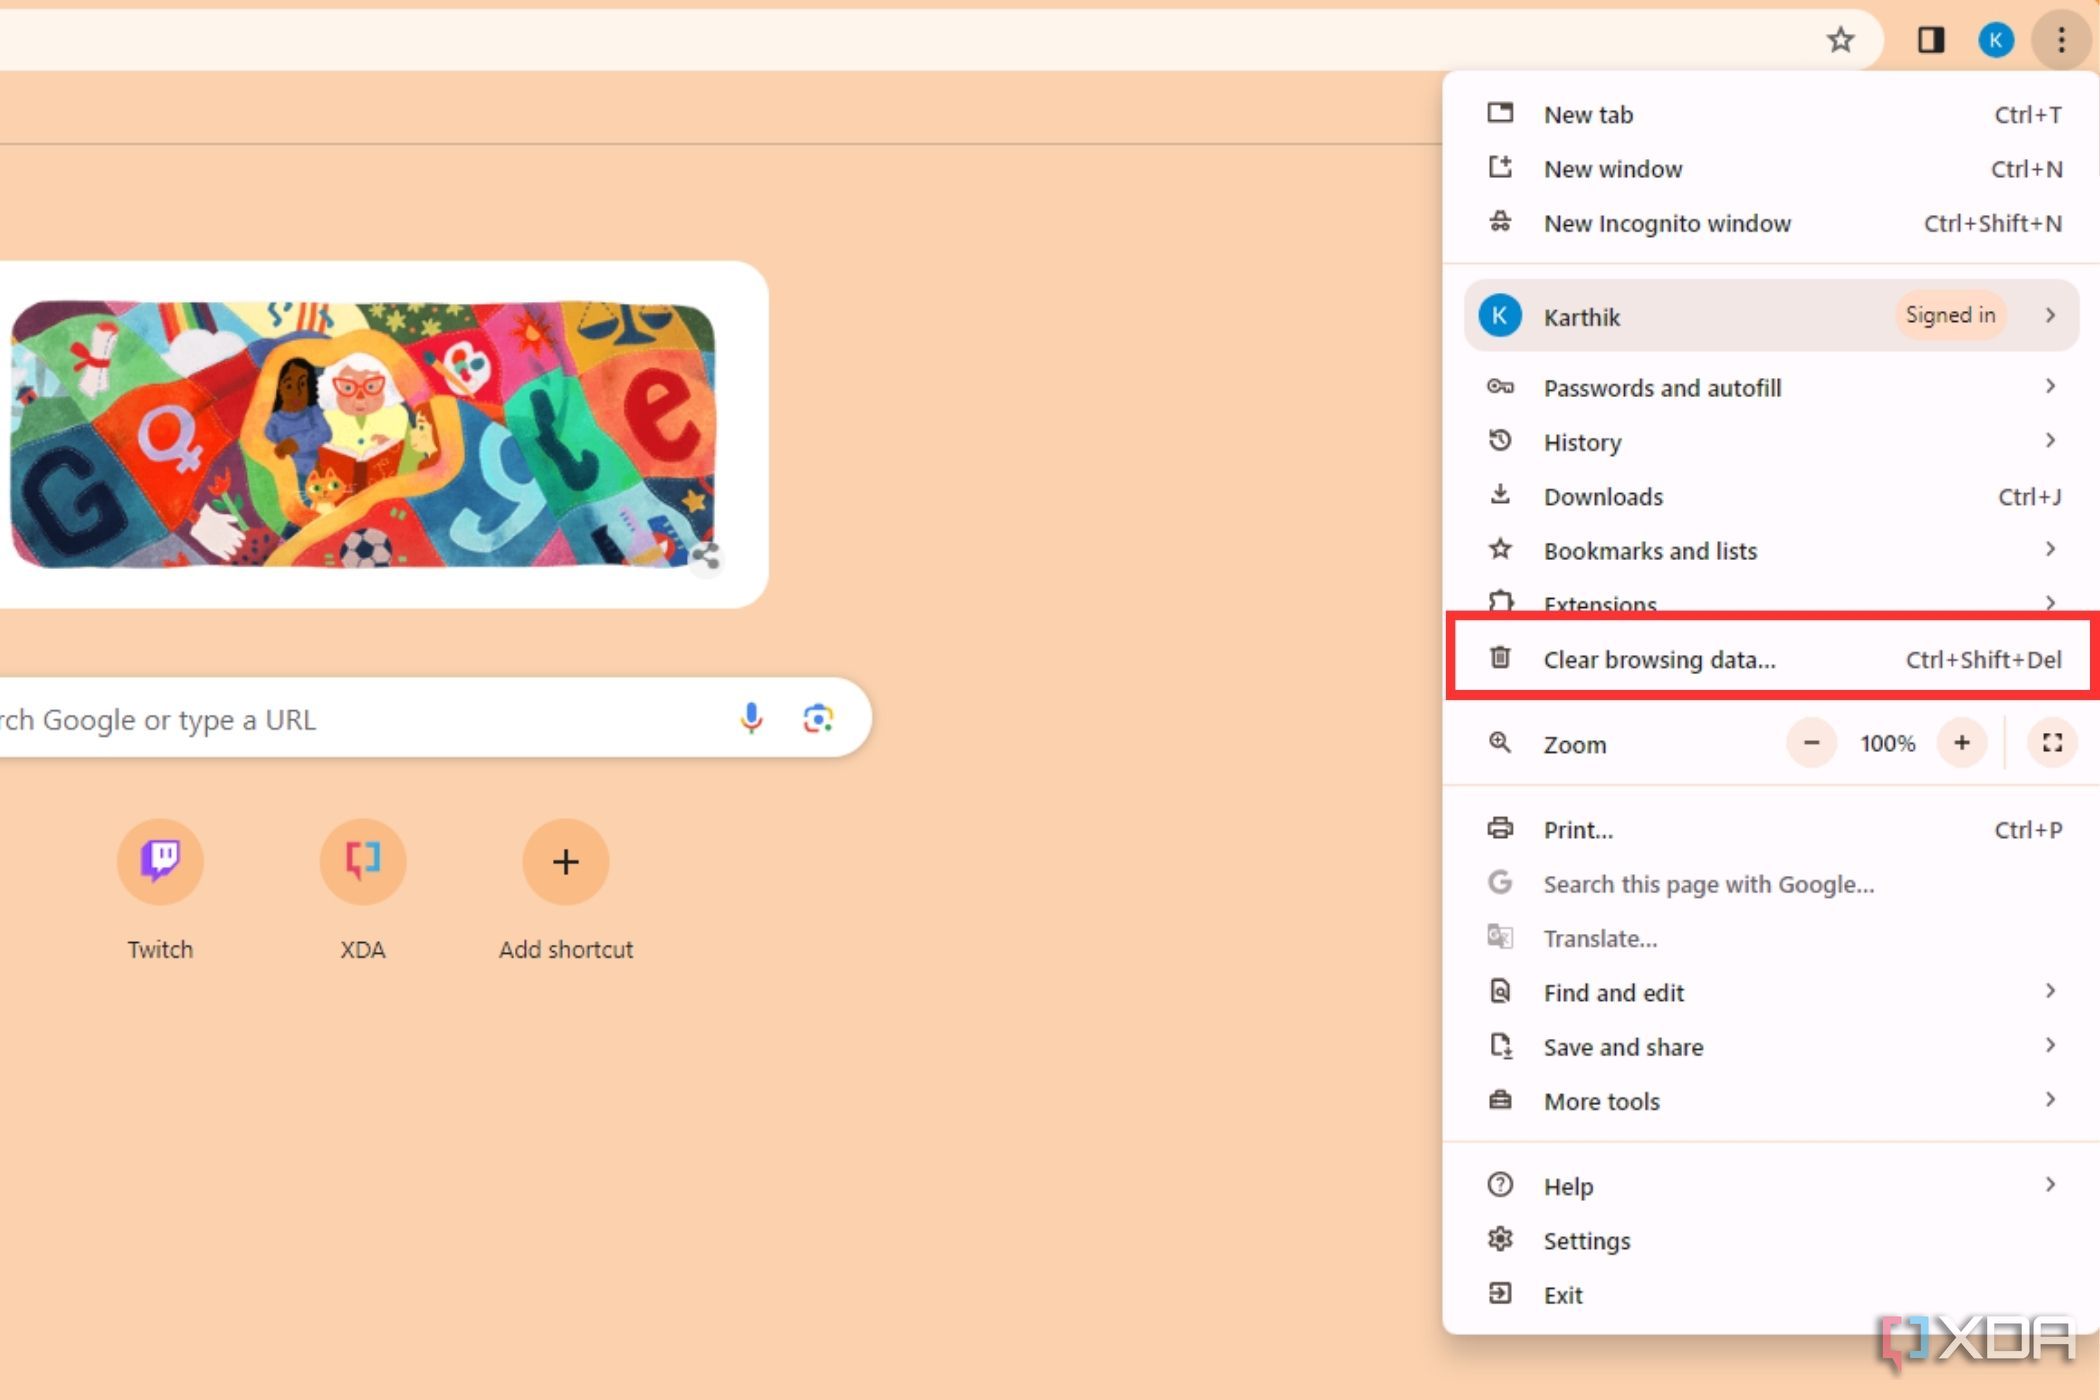
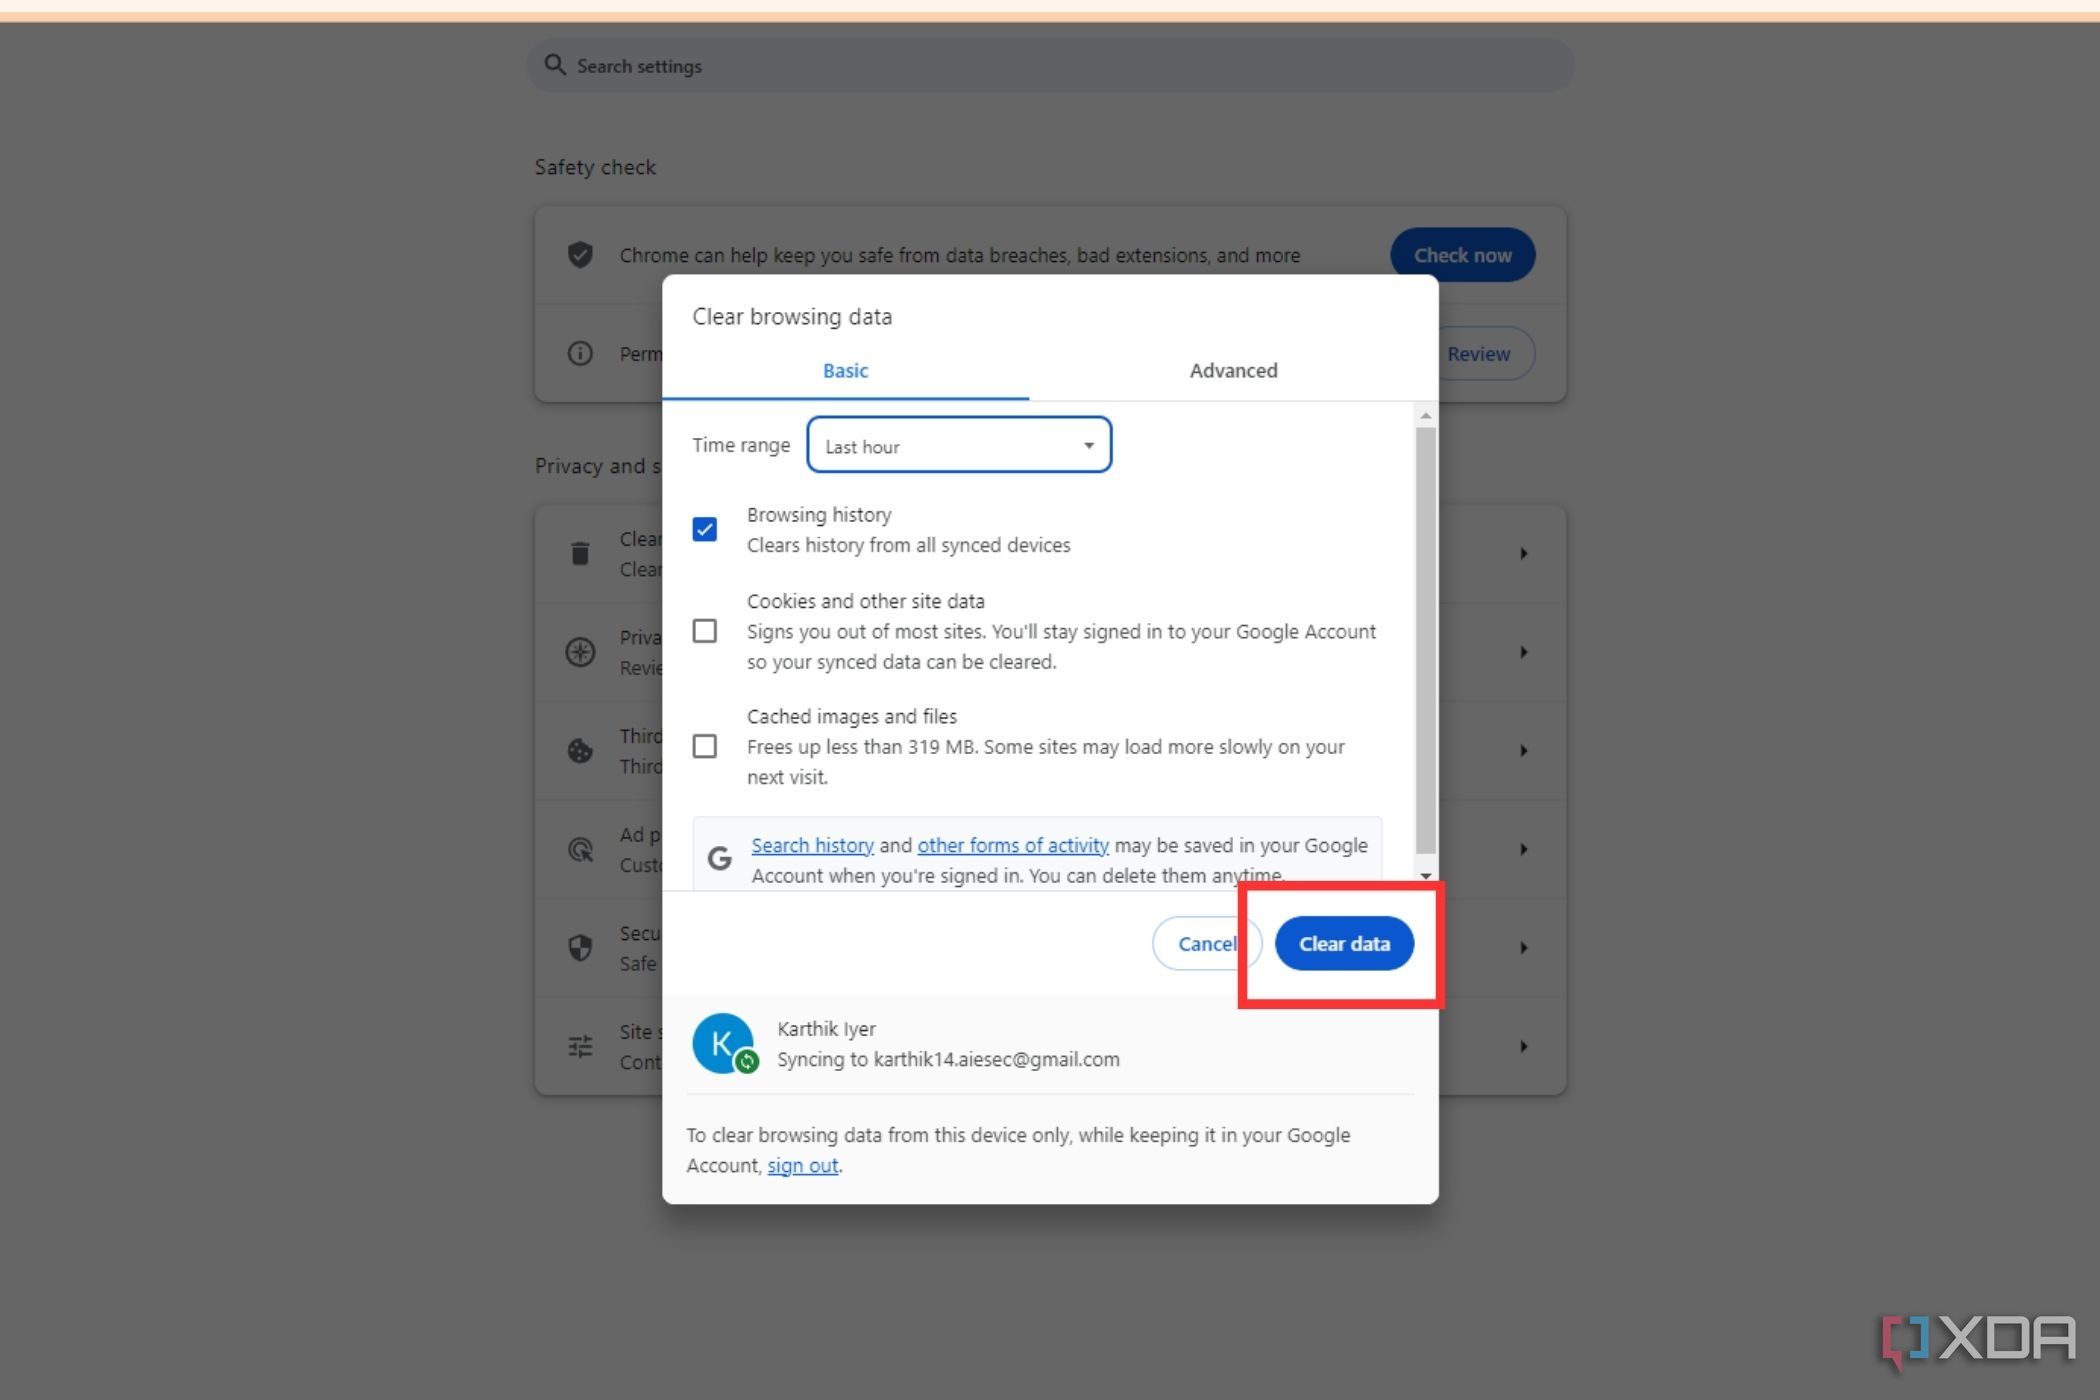
- Click the Clear browsing data option to open a new pop-up window. Alternatively, you can also press Ctrl+Shift+Del on your keyboard from within Chrome to open this pop-up window.
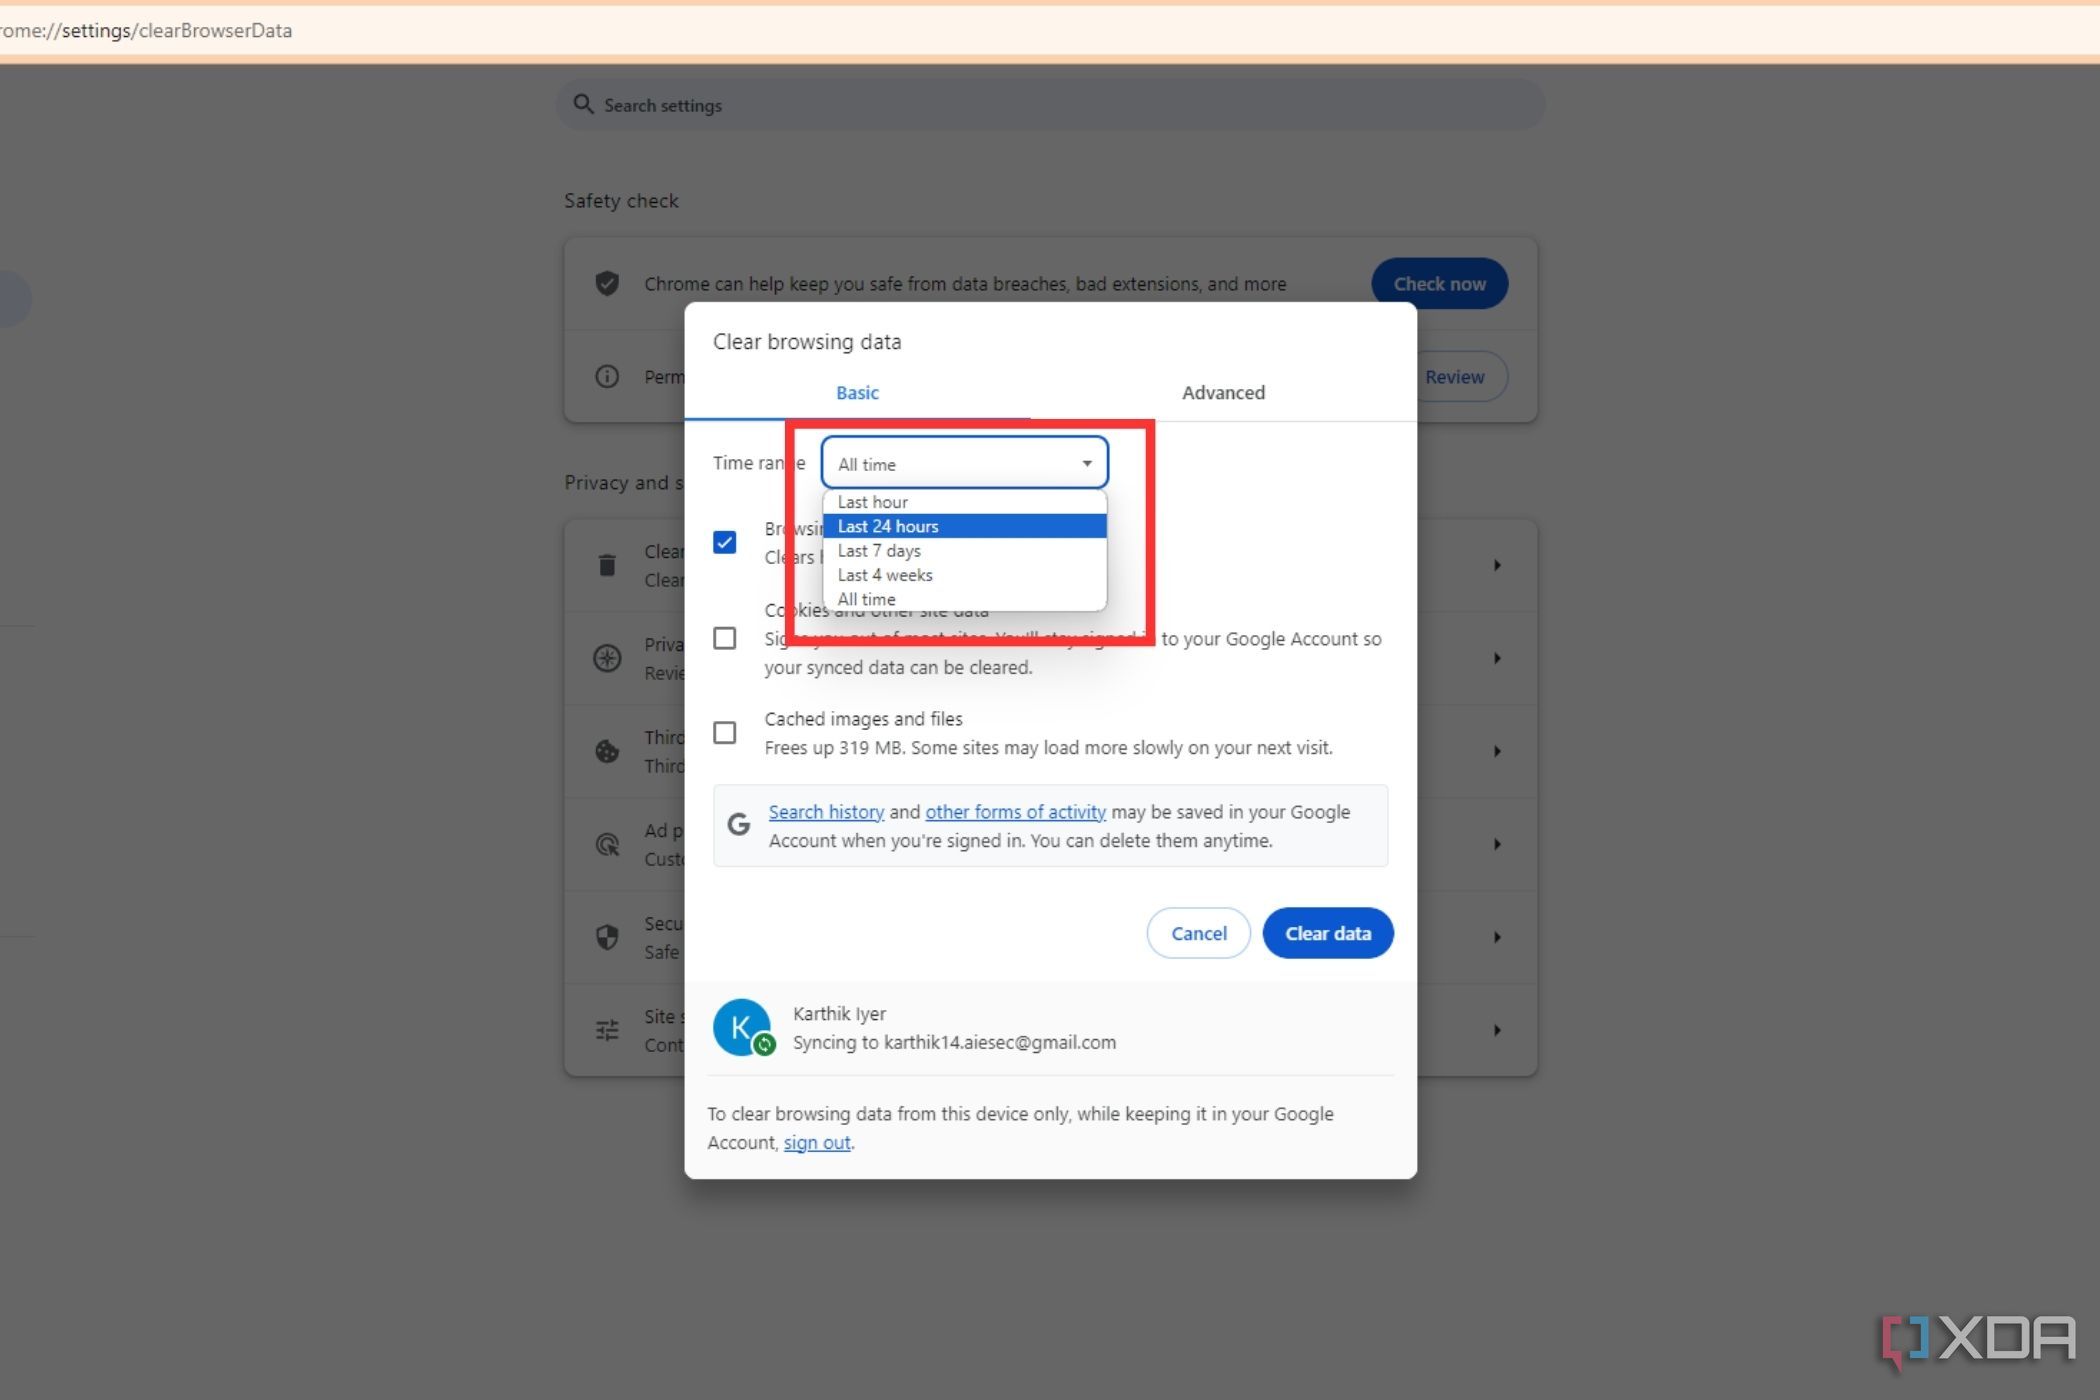
- Click the dropdown menu next to the Time range option to select how much browsing history you’d like to delete.
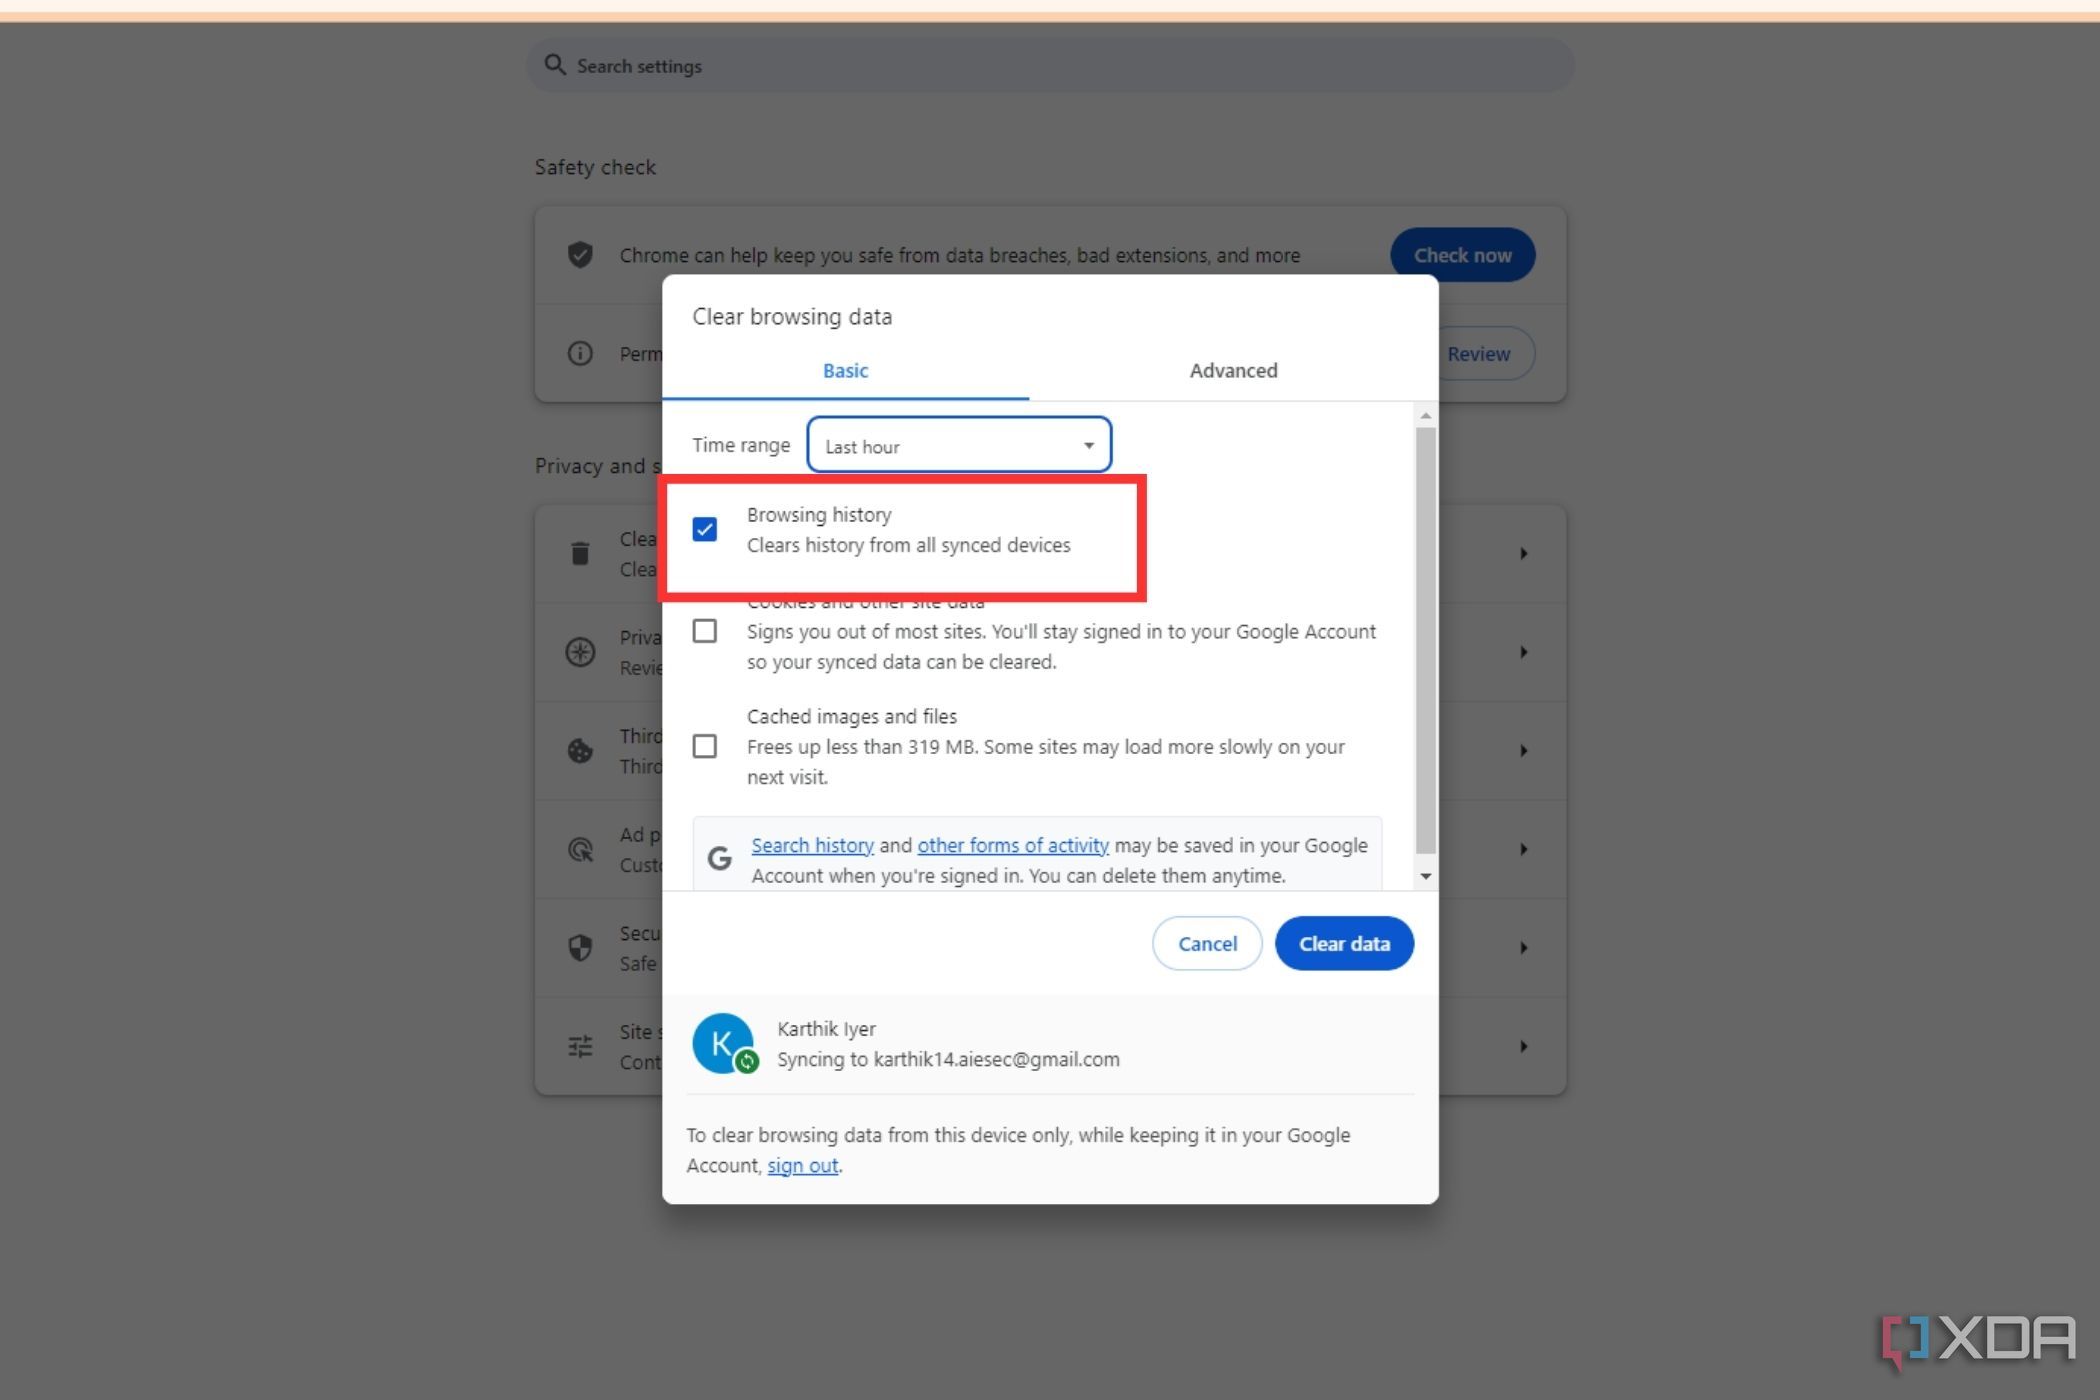
- Click the checkbox next to Browsing history, if it’s not selected already.
- (Optional) Check/uncheck next to Cookie and other site data and Cache images and files options if you’d like to clear them as well.
- Click Clear data button at the bottom to delete the browser history in Google Chrome.
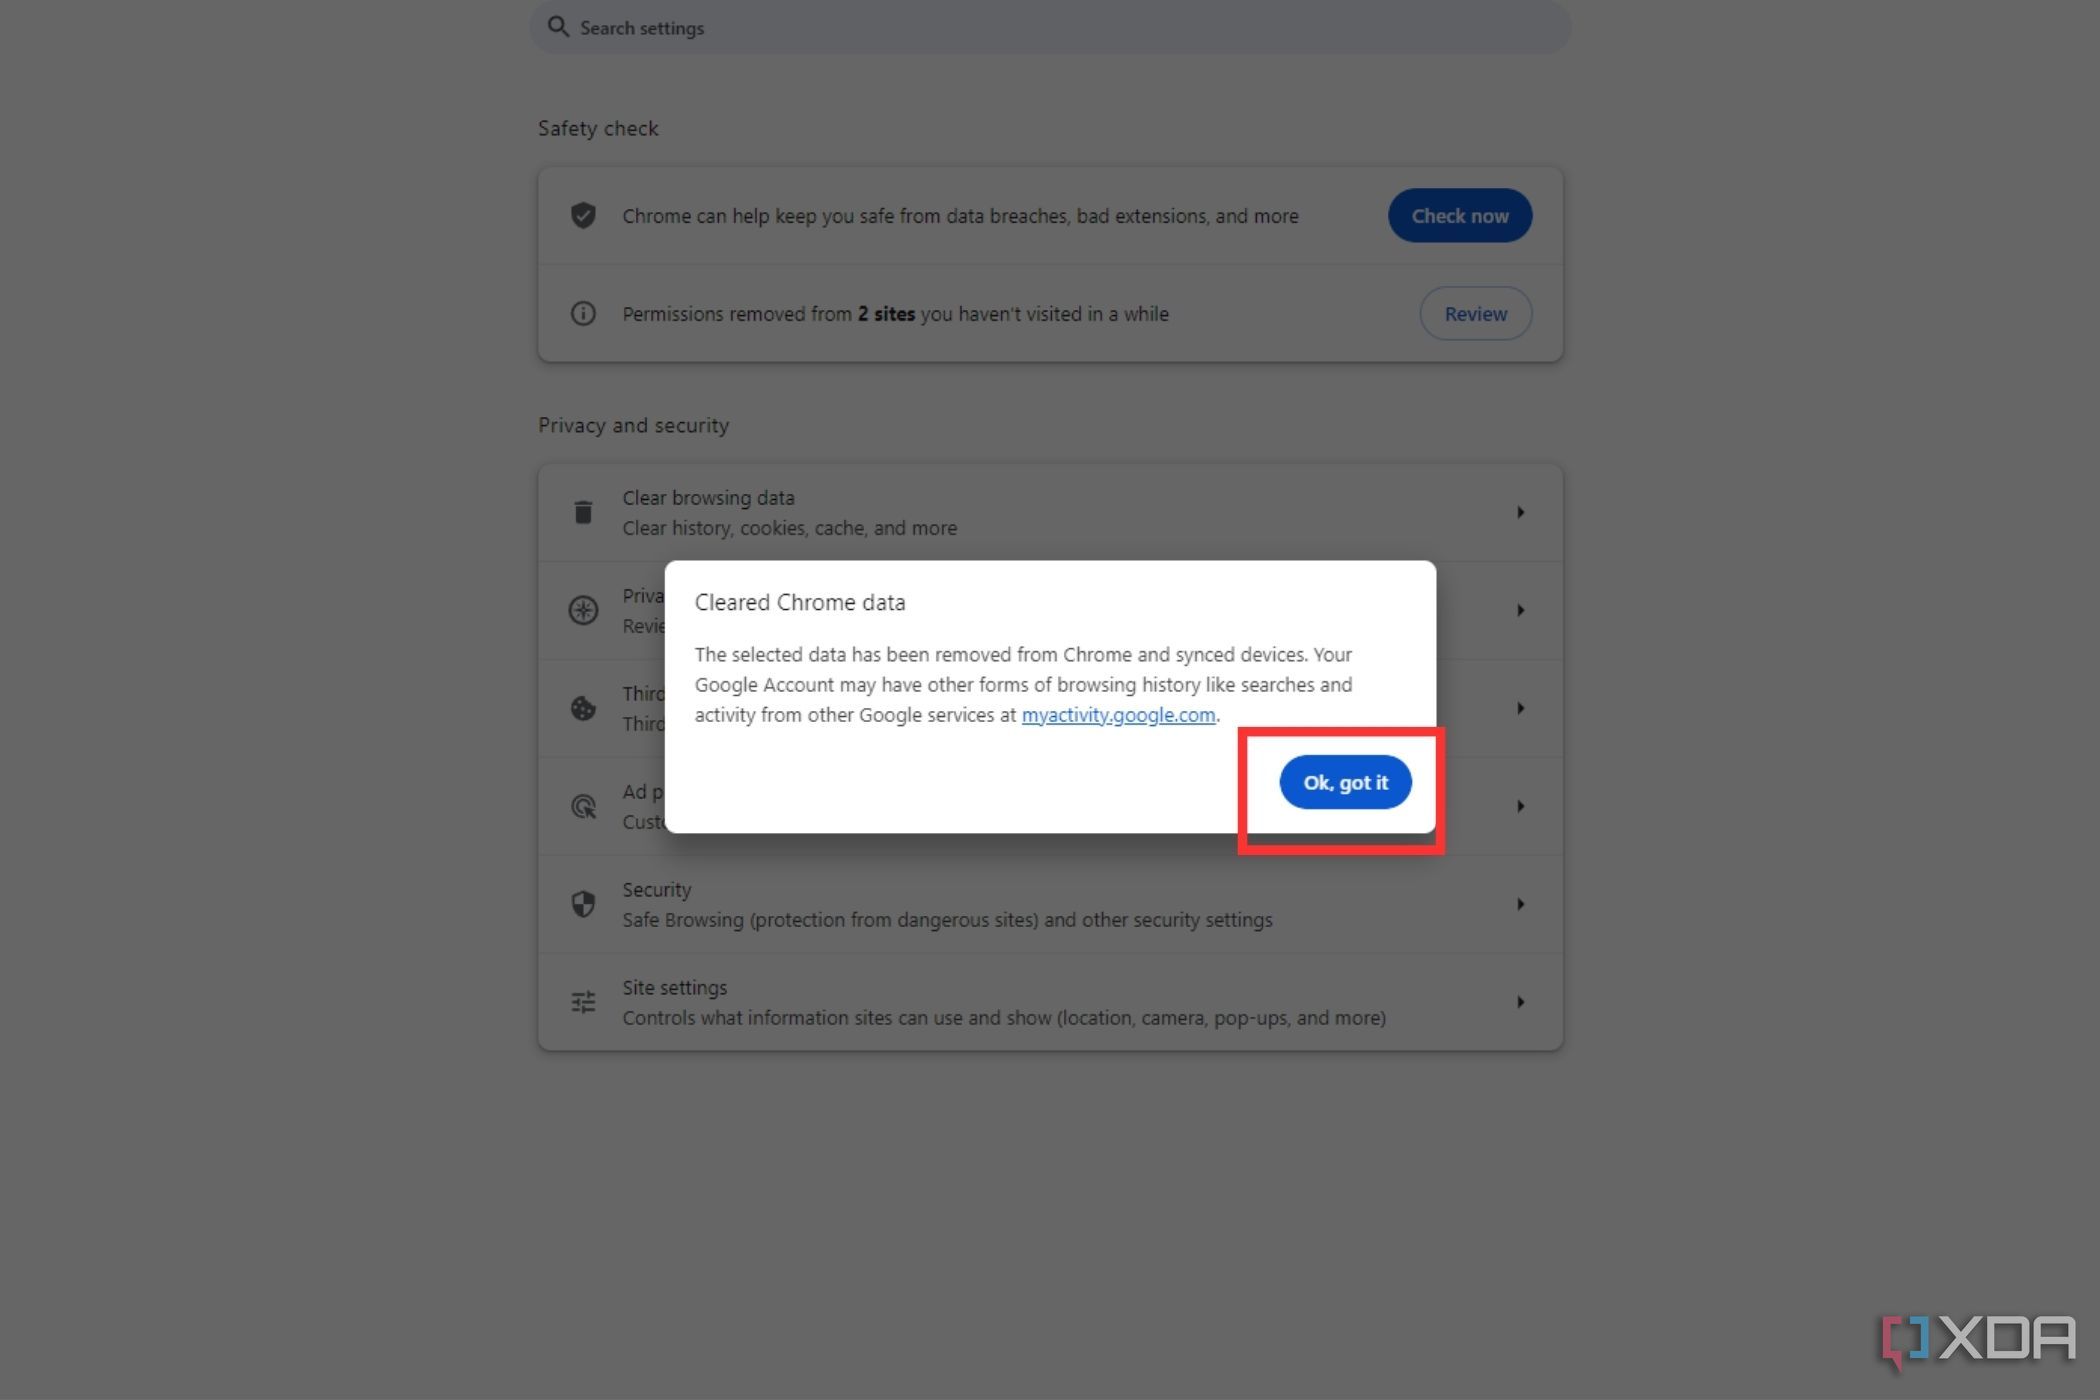
- Click Ok, got it button to close the confirmation screen.
And that’s it, you have now deleted the browsing history on Google for the selected duration. The process of clearing history is pretty much the same across all platforms, so do give it a try and keep your browsing history clean.
How to enable auto-delete in Chrome history?
If you don’t have time to manually delete the browsing history on Google Chrome, then you can also let Google handle it for you. All you have to do is enable Auto-delete under the Activity controls in Google settings, and you will be good to go. To do that:
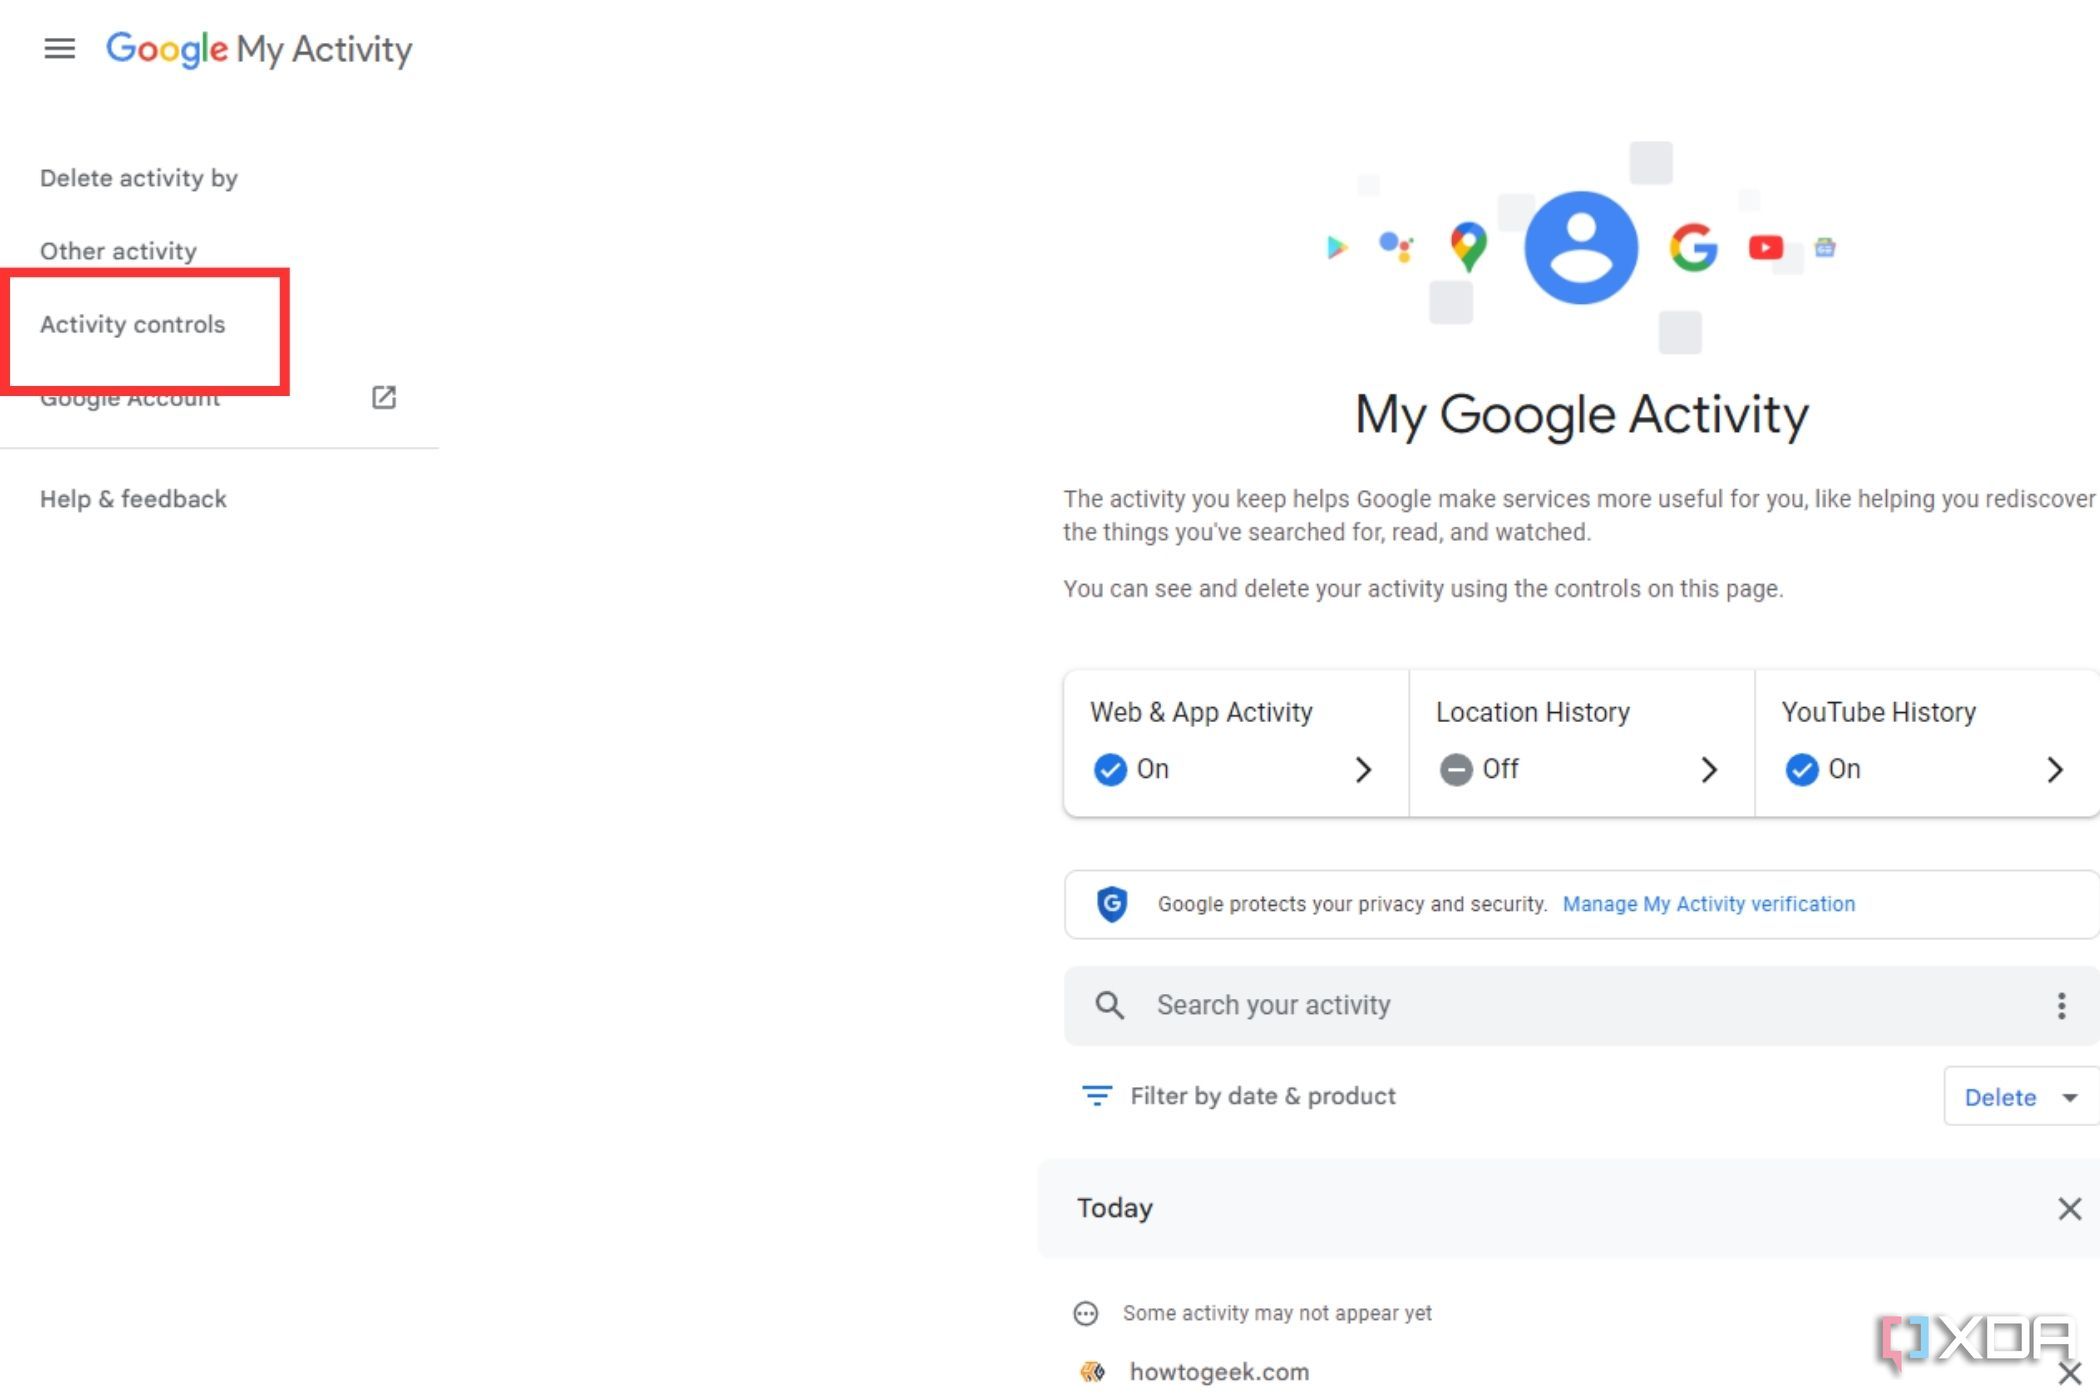
- Visit myactivity.google.com and click Activity Controls.
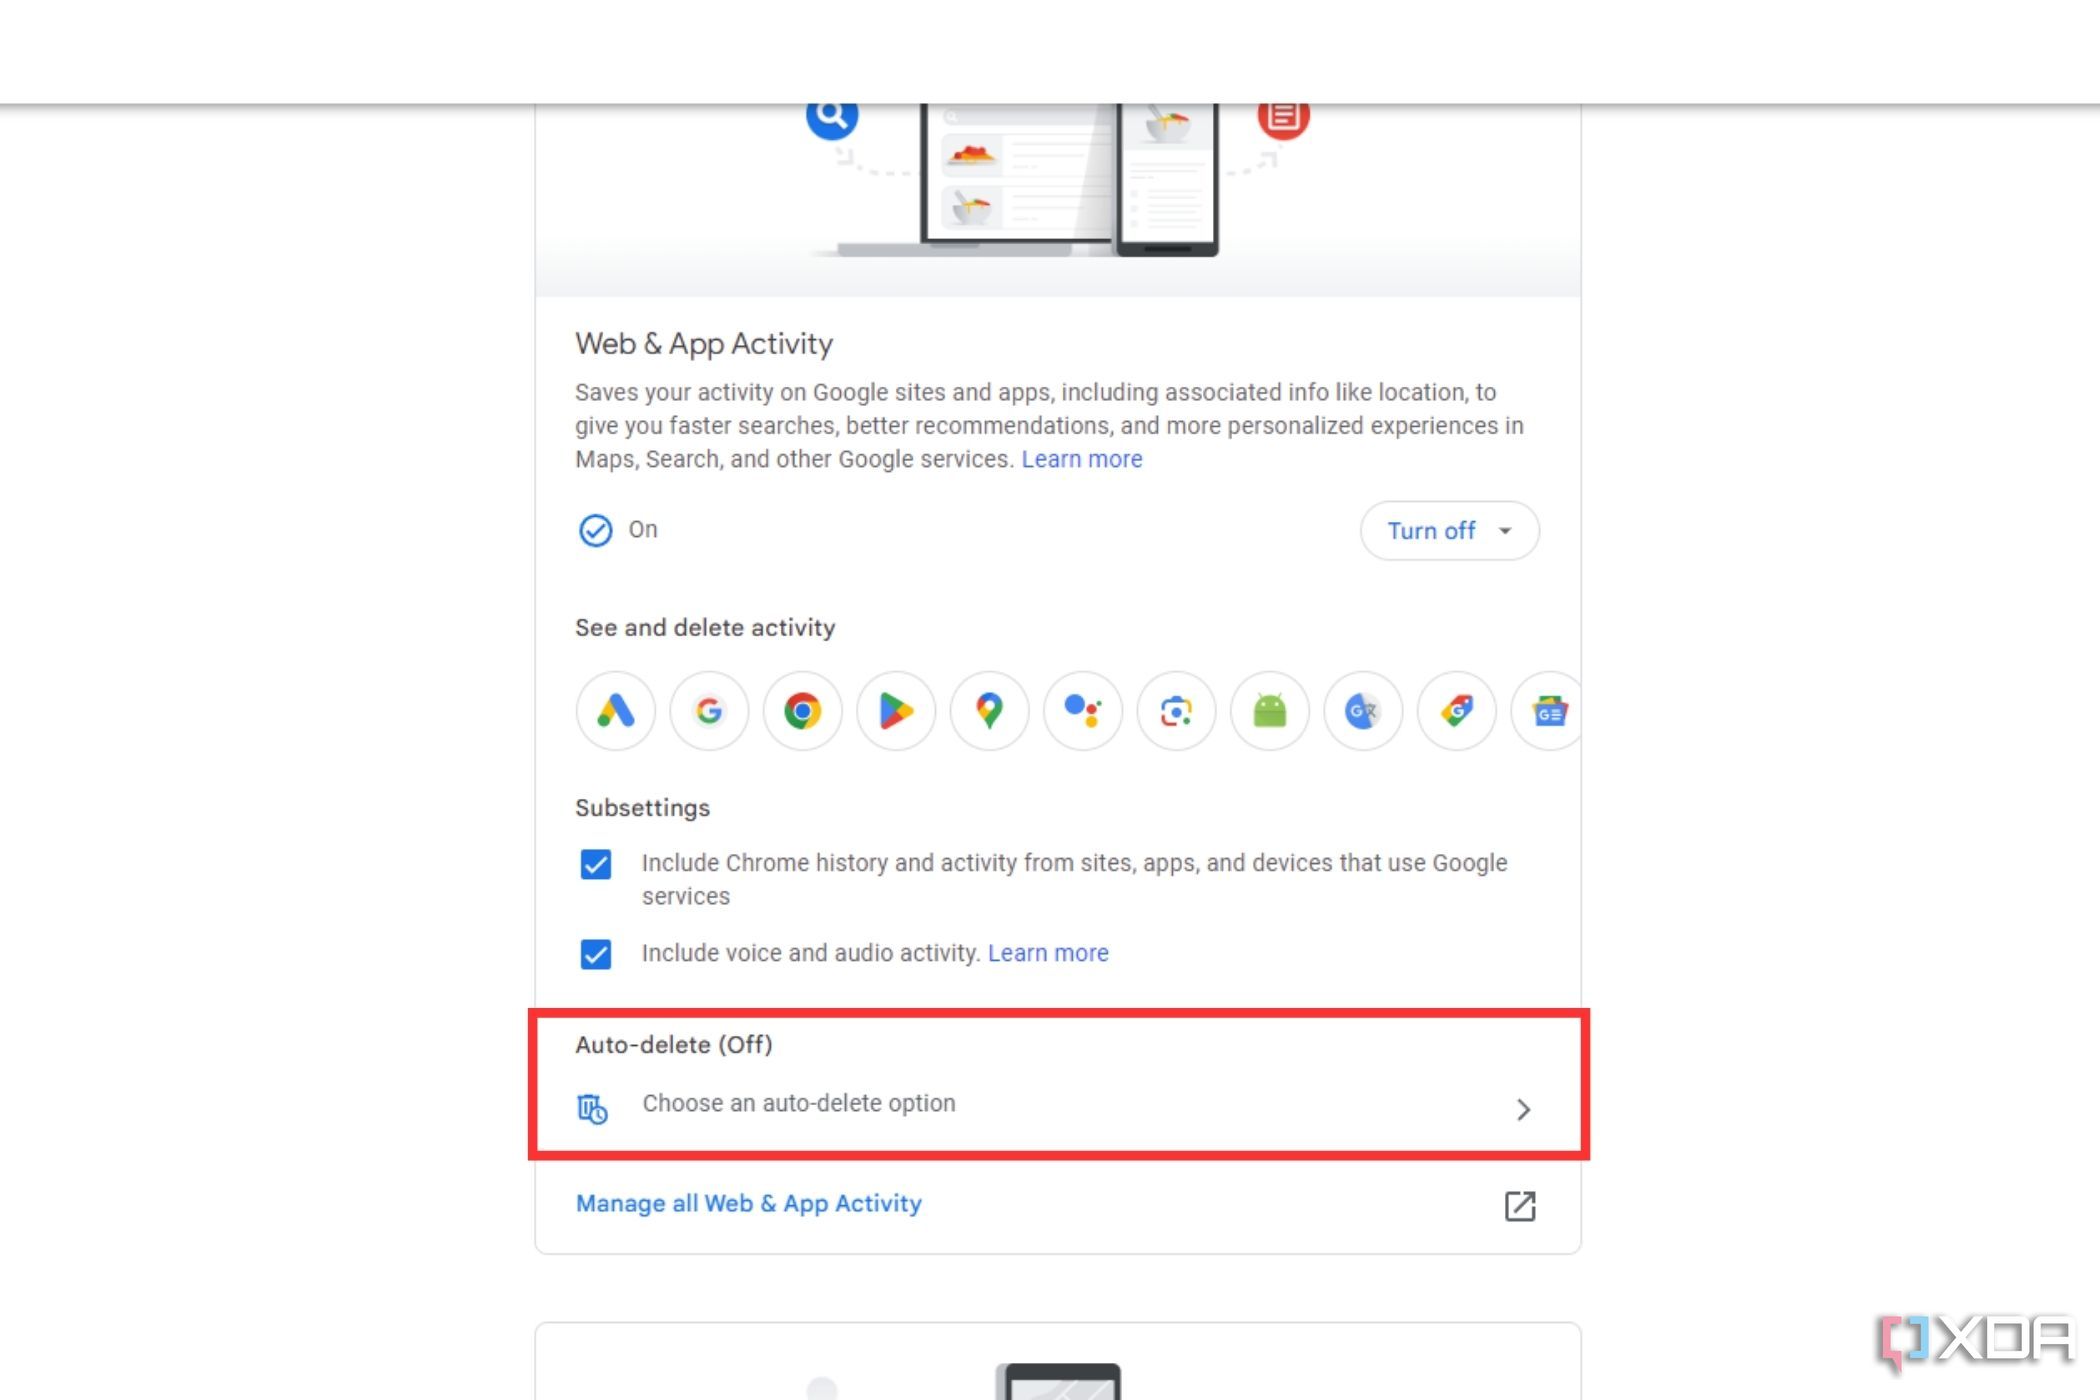
- Scroll down till you find the Auto-delete option, which should be set to Off by default.
- Click Choose an auto-delete option.
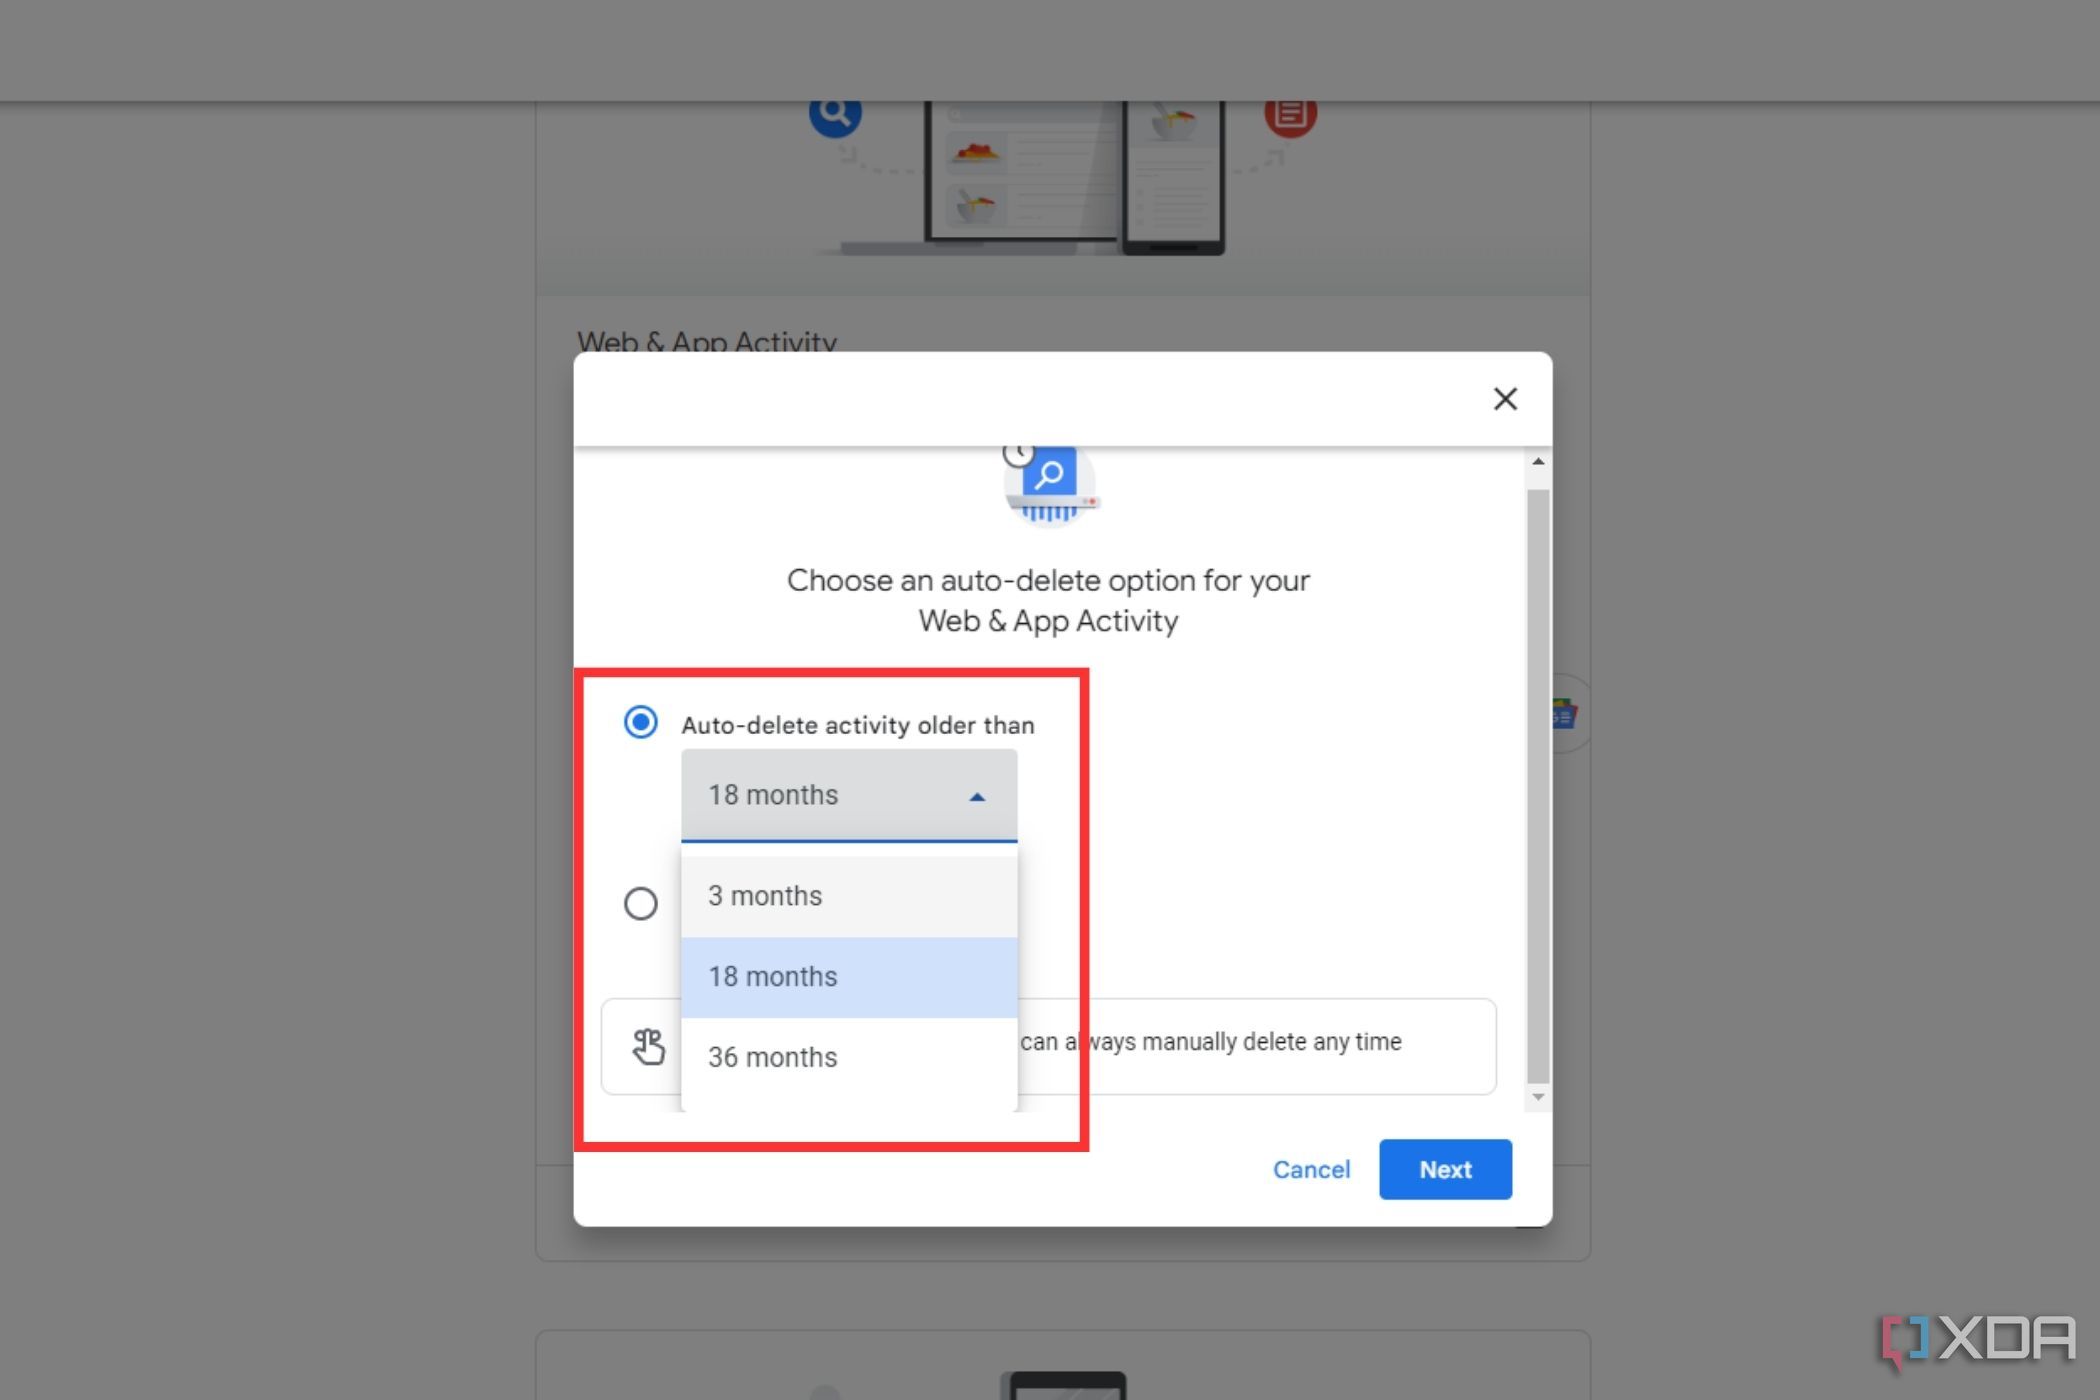
- Click the dropdown menu to set how frequently you want Google to automatically delete your Web & App activity, which also includes your Chrome history.
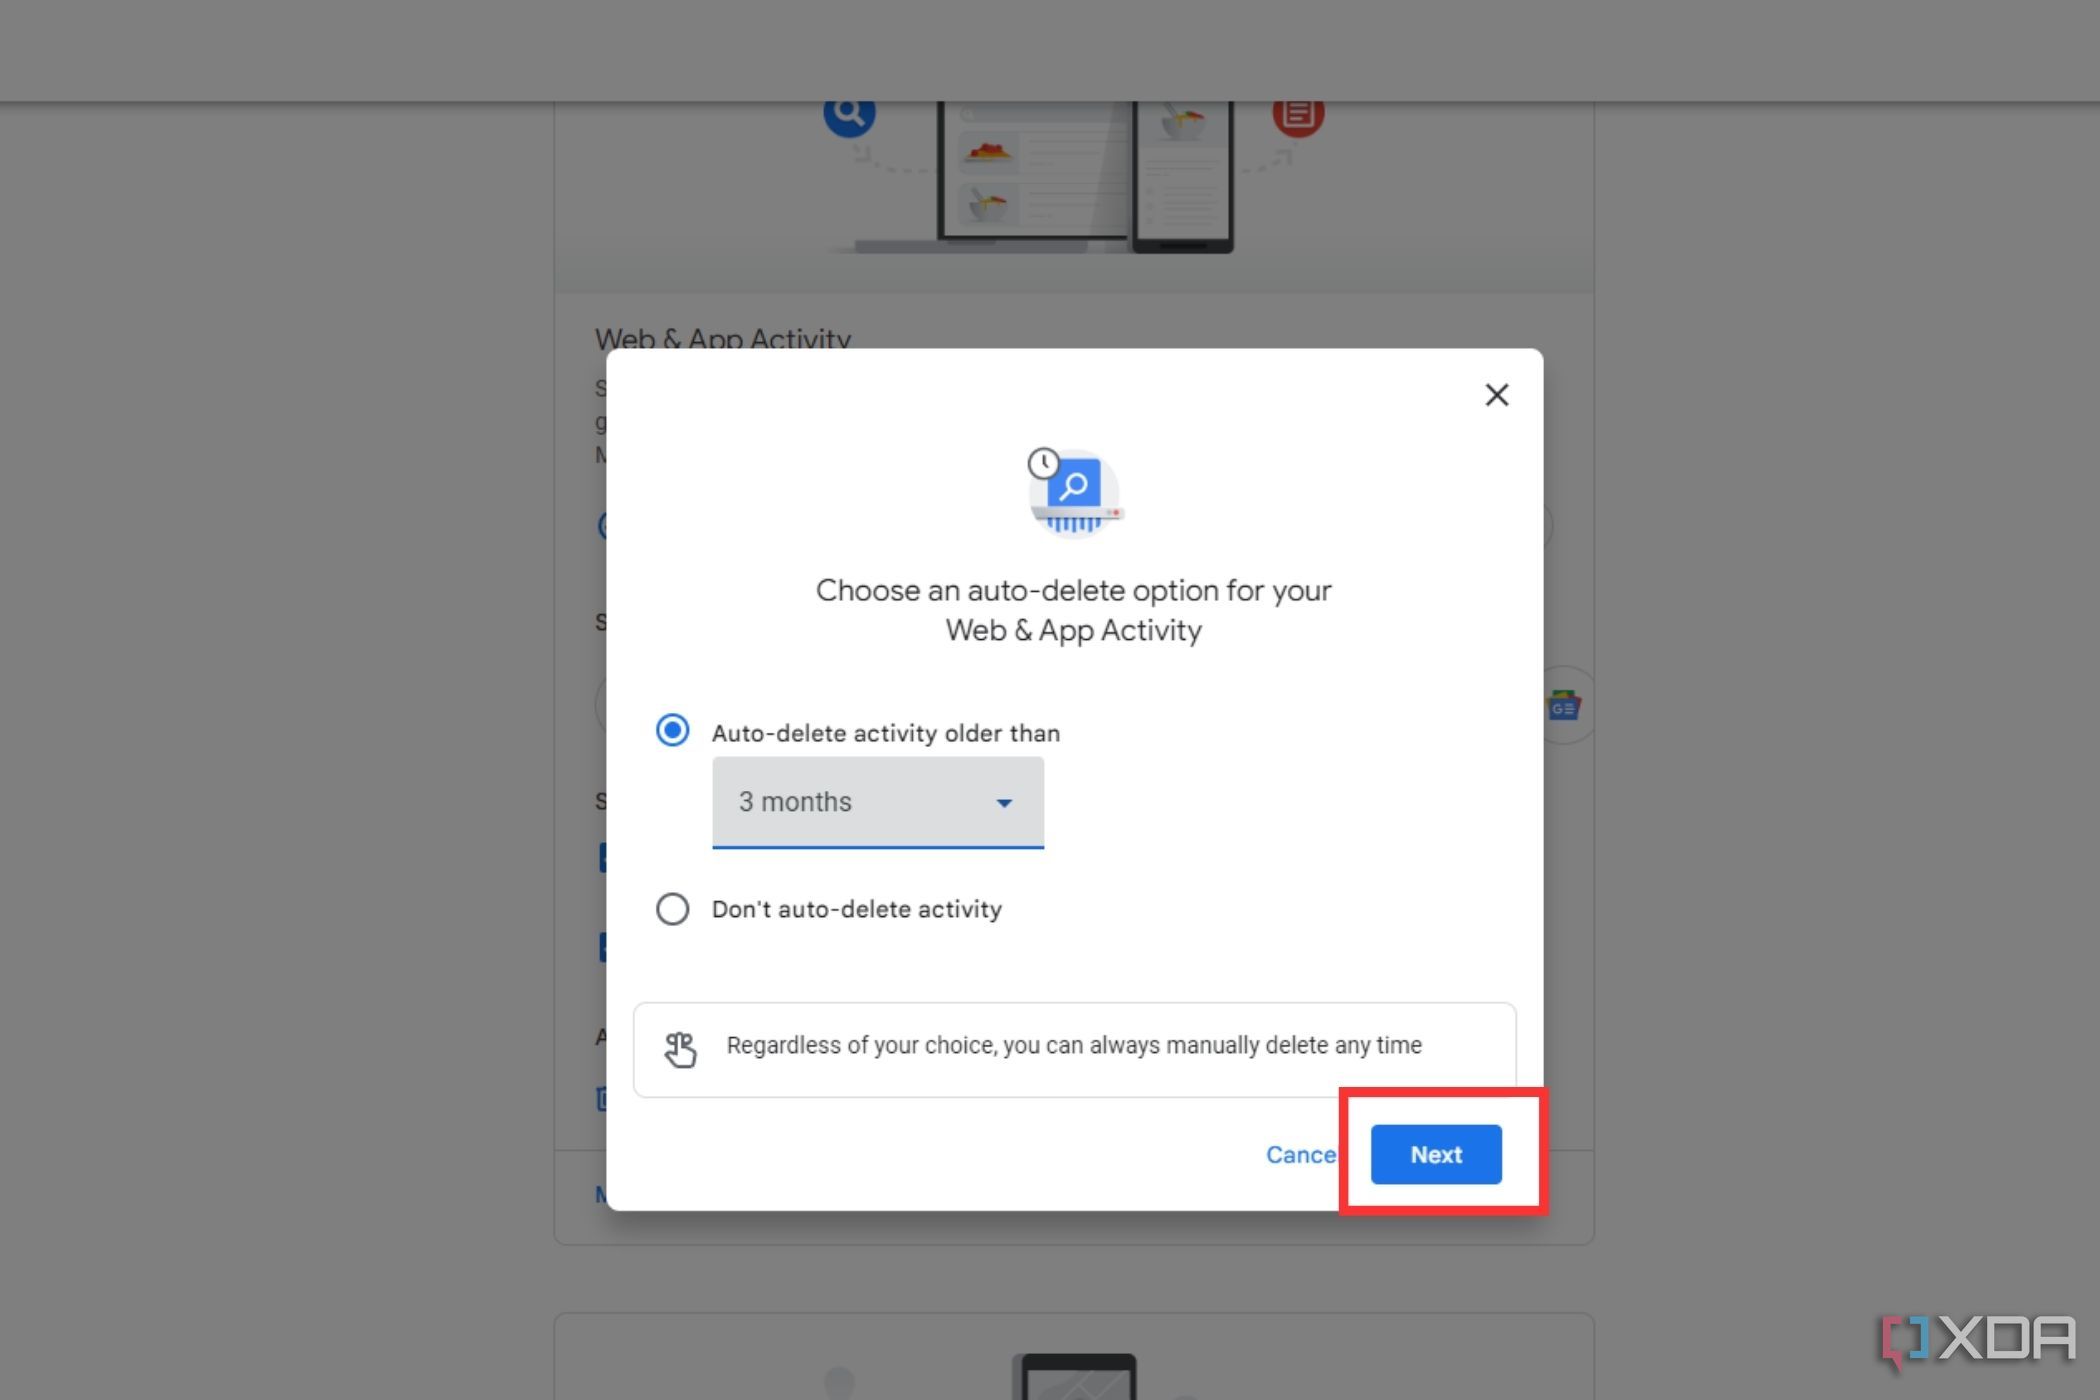
- Click Next.
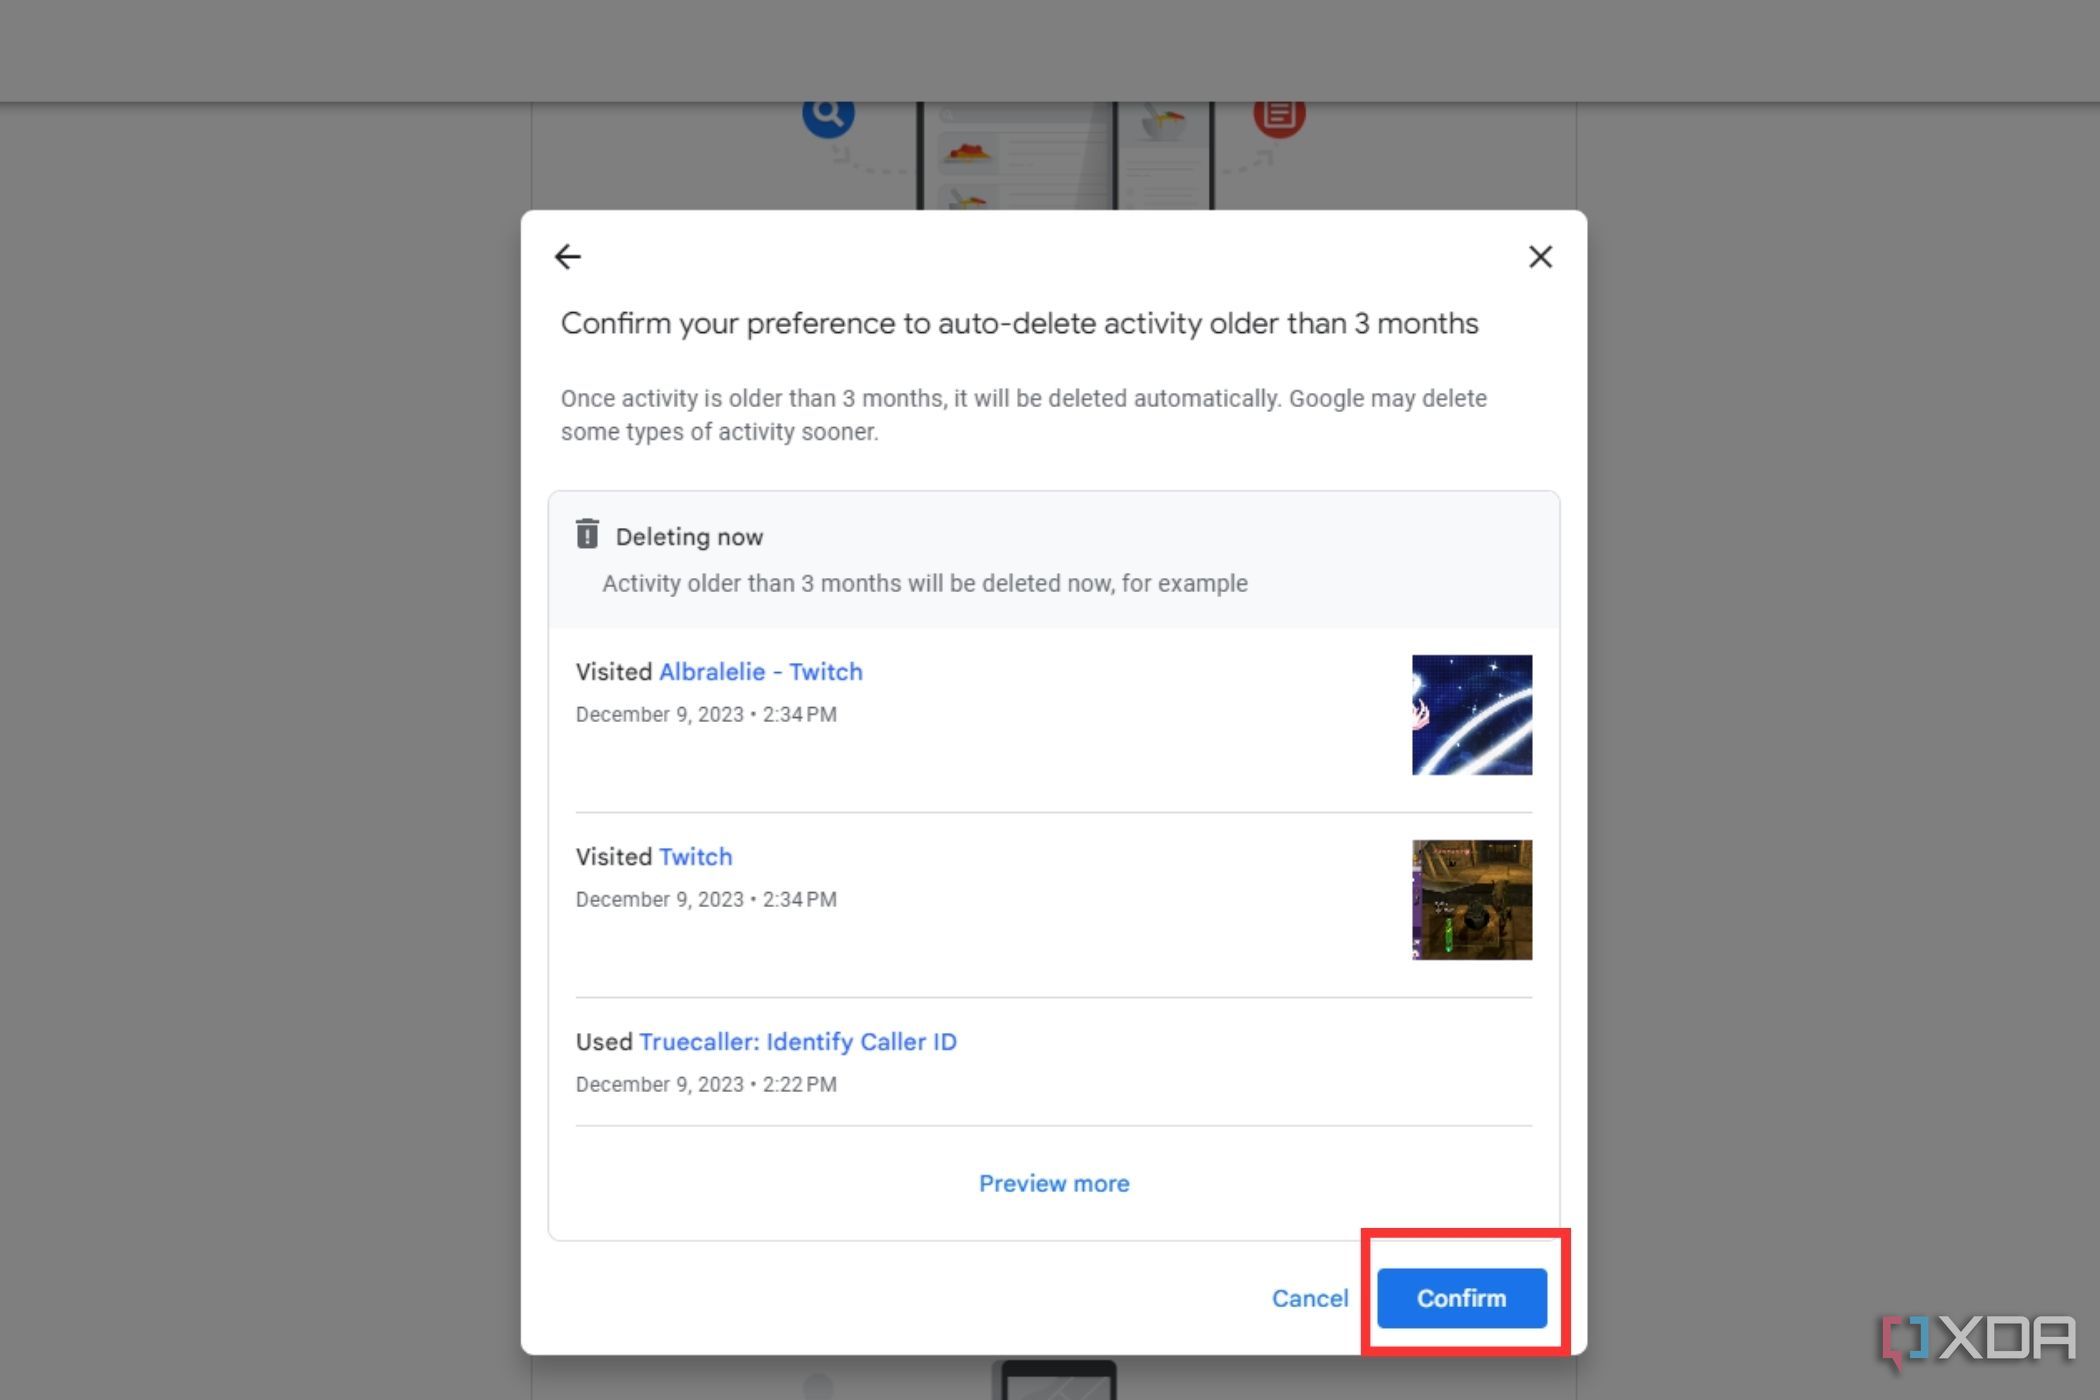
- Click Confirm on the pop-up window that highlights your preferences.
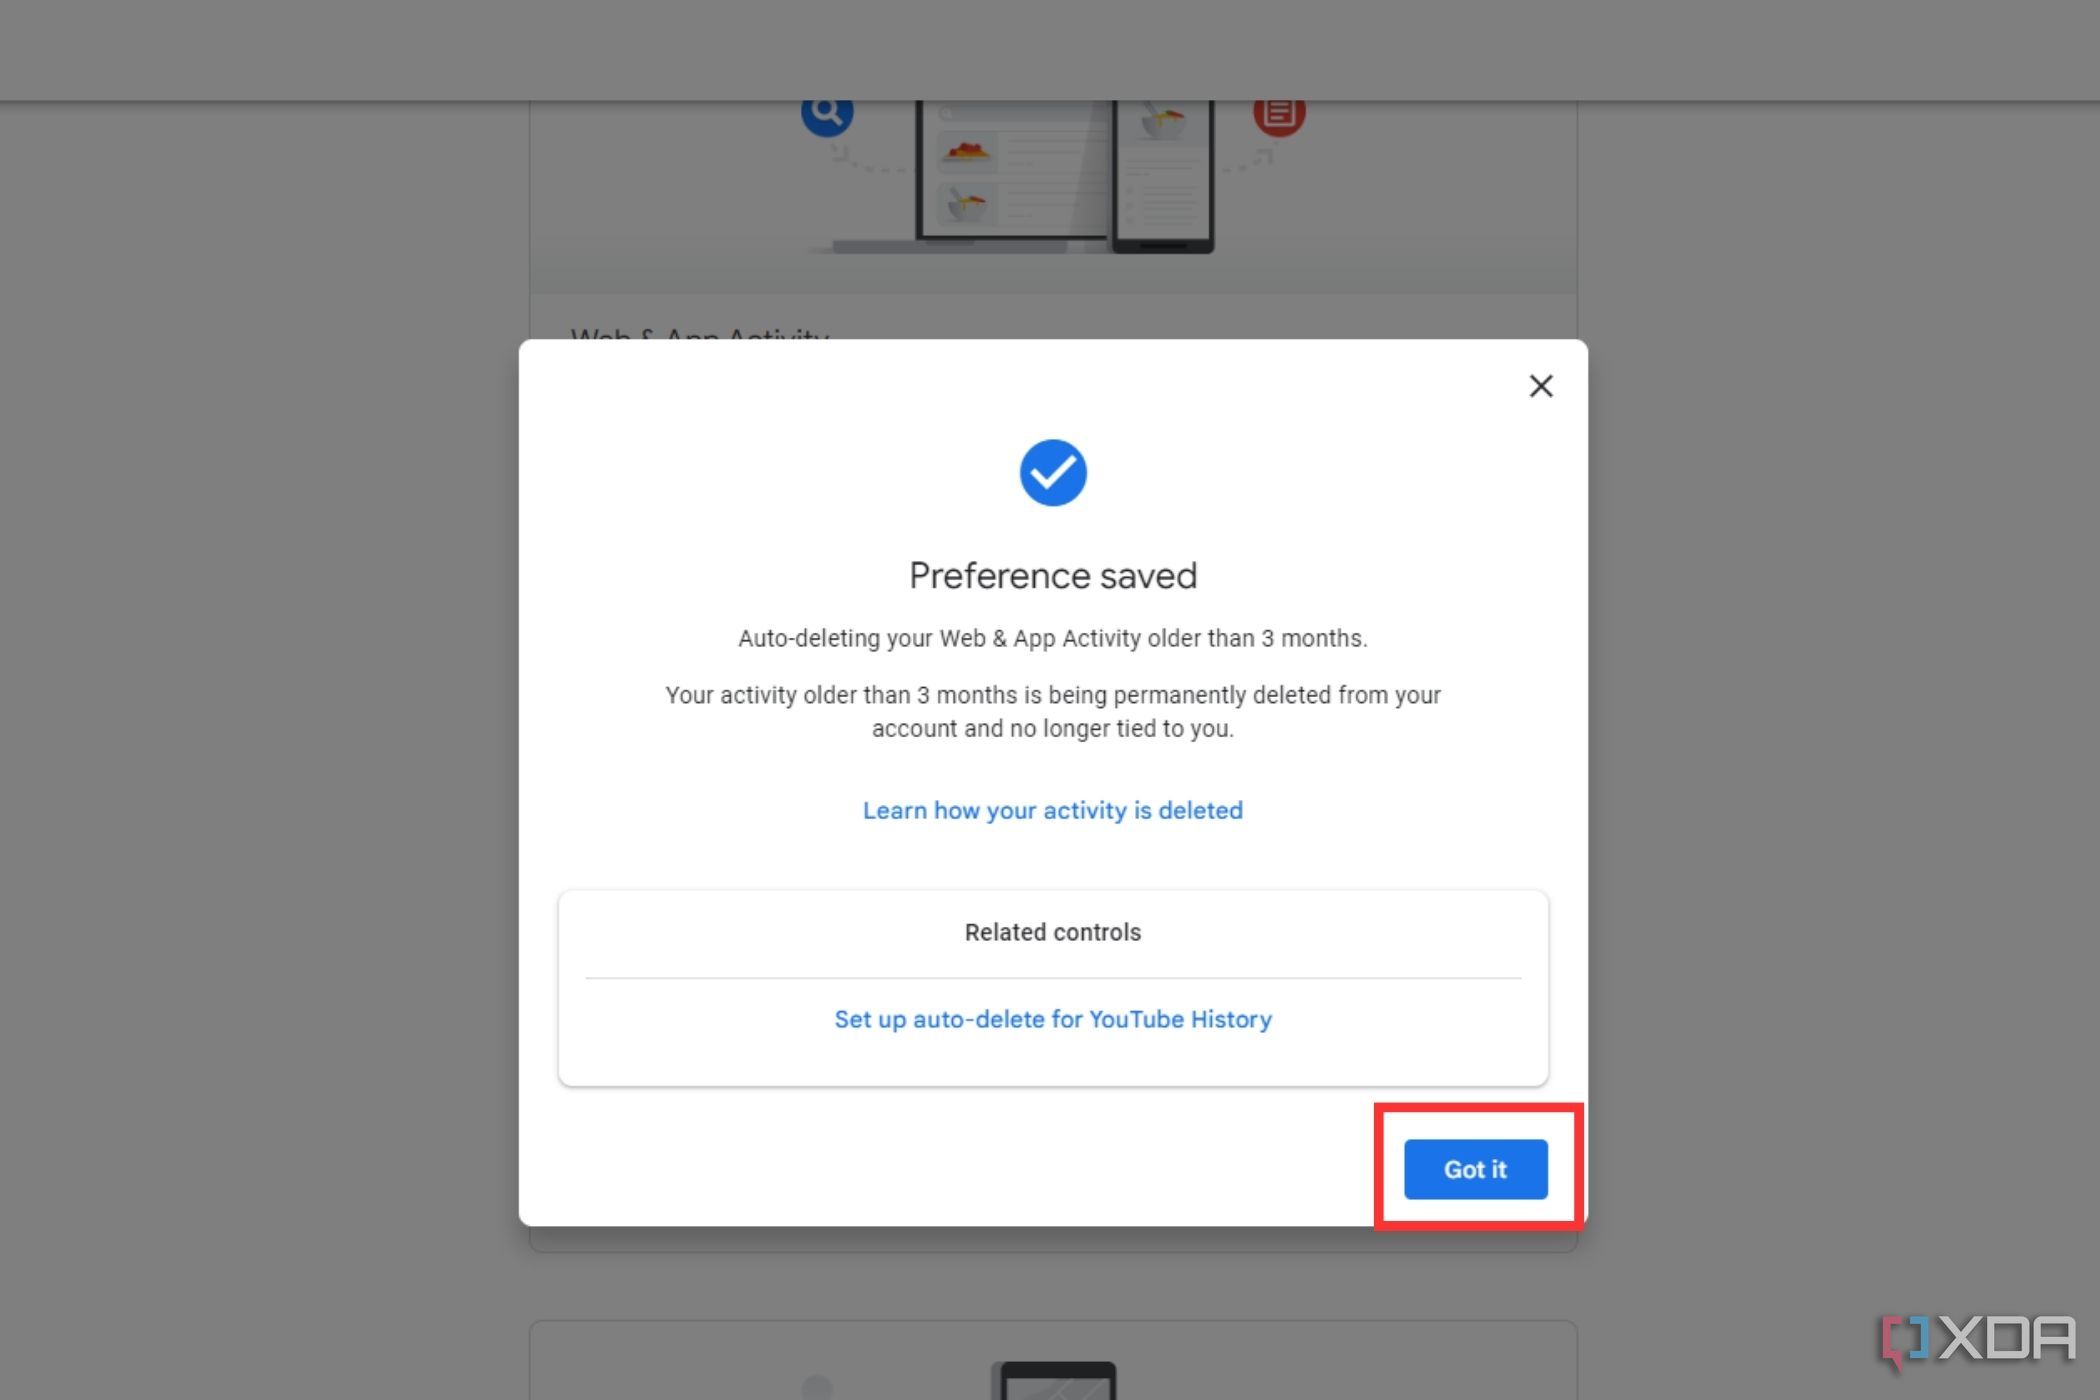
- Click Got it on the confirmation window to successfully save the setting.
Clearing browser history is quite easy in Chrome
Those are the two ways you can ensure your browser history is always clean and is safe from falling into the wrong hands. I highly recommend setting up the auto-delete functionality in case you don’t want to go through the hassle of deleting the history manually every once in a while.
