

When it comes to personalizing your Apple Watch, one of the most significant ways to express your style is by changing its band. Whether you desire a sporty silicone band for your morning run, a classic leather strap for work, or an elegant metallic chain for a dinner party, Apple offers a diverse selection of bands to suit your every mood and occasion.
However, swapping out your Apple Watch band may seem a tad bit daunting if you’ve never done it before. But, don’t fret! This article will guide you through the step-by-step process of changing your Apple Watch band.
What you will need:
- Apple Watch
- New Watch Band
- Clean, Soft Cloth
- Flat, well-lit workspace
Steps to Change Your Apple Watch Band:
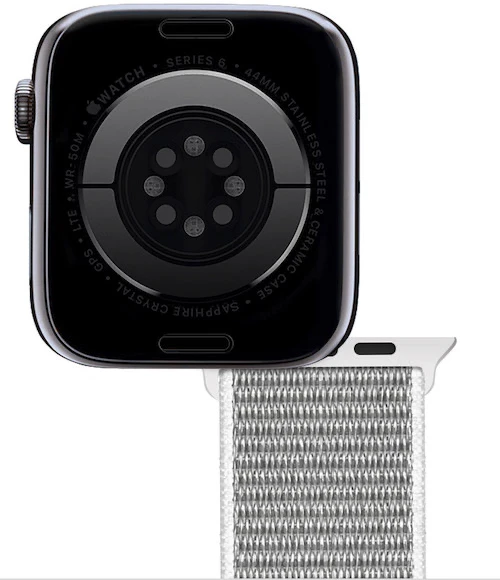
1. Remove the Current Band:

Before you begin, place your Apple Watch face down on a clean, soft cloth to prevent any potential scratching of the watch face.
Press and hold the band release button located on the back of the watch. This button is a small oval that sits flush with the watch body between where the two band parts connect. While still pressing this button, slide the band across to remove it. You may need to apply a bit of force, but it should slide out relatively easily. Remember to remove both sections of the band.
2. Match the New Band with Your Apple Watch:
Before attaching the new band, ensure that it is compatible with your Apple Watch model and size. Not all bands fit all watches, so it’s essential to double-check before proceeding.
3. Attach the New Band:
Once you’ve made sure the new band is the right match, it’s time to attach it. Take one section of the band and align it with the corresponding slot on the watch. You will notice that one side of the band has a small button, and this should face outwards when attached.
Slide the band into the groove until you feel it click into place. If the band doesn’t lock, remove it and try again. You should never force the band into the slot. If you’re having trouble, ensure that you’re not inserting it backwards.
Repeat this step with the other half of the band.
4. Check the Fit:

Finally, once both parts of the band are in place, put on your Apple Watch. It should fit snugly but comfortably around your wrist. If the band is too loose or too tight, you may need to adjust the band or consider getting a different size.
Tips for Changing Your Apple Watch Band:
- Do it Gently: When changing the band, always remember to be gentle to avoid any possible damage to the watch or band.
- Keep it Clean: Keep both your watch and the band clean. It’s a good idea to periodically clean the band, especially if you sweat a lot or get it dirty. A damp cloth can be used for the watch and the band, but avoid using any strong cleaning agents.
- Customize: Don’t shy away from personalizing your Apple Watch to your style. There’s a wide array of third-party bands available on the market. Just make sure that the band is compatible with your watch model.
In conclusion, changing the band of your Apple Watch is a straightforward process. All you need to do is remove the old band, match the new band, attach it, and ensure the fit is perfect. With lots of Apple Watch band styles and materials available, your Apple Watch can easily be tailored to fit any occasion or outfit. We hope that you find this guide useful, if you have any comments, suggestions, or questions, please let us know in the comments section below. You can find out more details about how to change the band on your Apple Watch over at Apple’s website:
Image Credit: Chris Karnbach, Apple
Filed Under: Apple, Guides
Latest TechMehow Deals
Disclosure: Some of our articles include affiliate links. If you buy something through one of these links, TechMehow may earn an affiliate commission. Learn about our Disclosure Policy.